For Supported Apps, our new Menu Manager tool provides a simpler, more intuitive way to manage your integrated menus with Doshii.
Doshii Dashboard is a tool for venues to manage their integrated app menus. It is suitable for advanced users and venues with more complex menu requirements.
For users with simple menu management needs, our new Menu Manager tool has been designed to be a simpler, more intuitive alternative supported by a wide range of ordering apps.
If you've used Doshii Dashboard previously and want to continue using it, or if you have advanced menu needs, this article explains how to use Doshii Dashboard to manage your menus.
In this article:
Accessing your menu using Doshii Dashboard
- Log in to dashboard.doshii.io using your Doshii username and password.
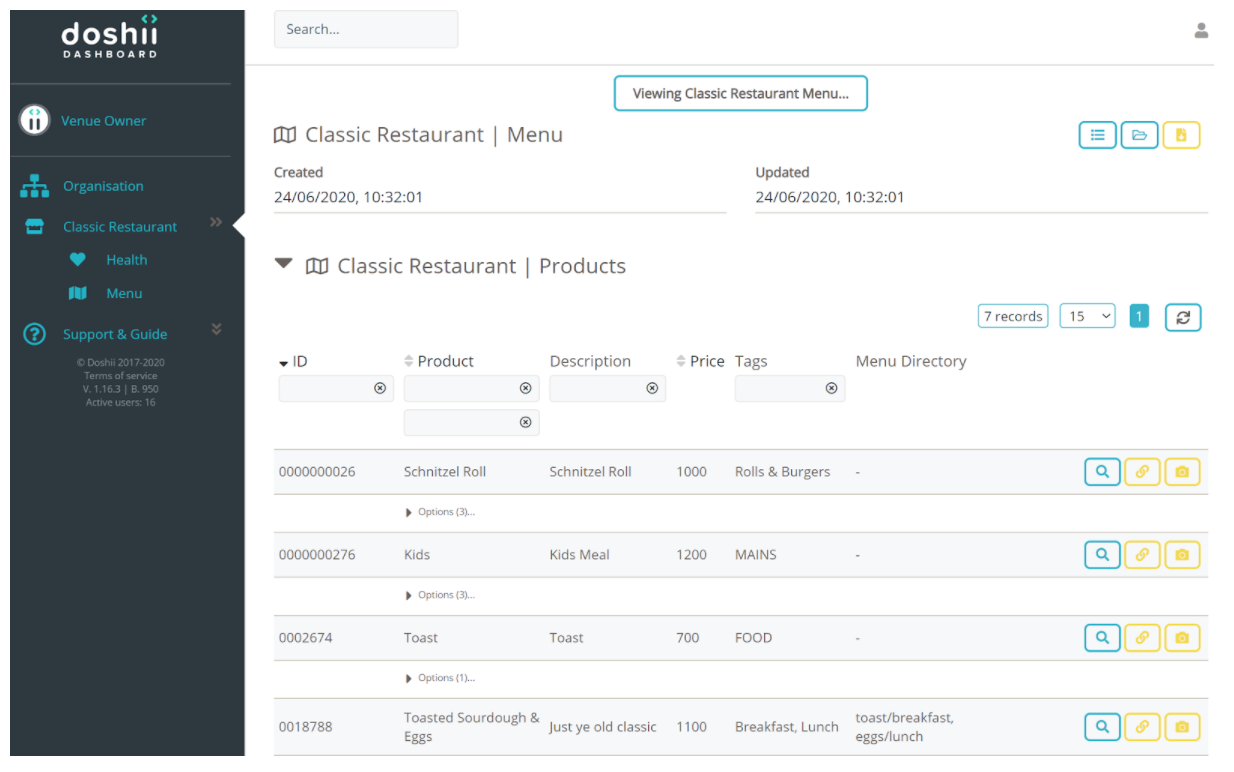
- Once logged in, locate your venue's name in the navigation panel on the left-hand side of the screen and select the expand button.

- Select Menu from the list. The first menu displayed will be your POS menu.
Your POS and app menus
When you open the Menu screen in Doshii Dashboard, you will first be presented with the menu items Doshii has received from your connected POS—your POS menu.
Your POS menu is read-only in Doshii. While you can't make changes to your POS using Doshii's menu management tools, you can use these tools to modify how these menu items are displayed in your connected ordering app menus, including item names, descriptions, prices, images, categories and more.
The first thing you may notice about your POS menu is that your menu items are presented as they are within your POS. Items may be named using abbreviations and may be missing descriptions or other details you'd want displayed to your customers in your ordering apps.
For example, for the item with POS ID 110000203, the product name is Half Half:
When you link an item from your POS menu to an ordering app menu, you can customise how the item appears to customers.
At the top of the Menu screen, a tab button is displayed for your POS menu, along with each ordering app connected to Doshii. These are your app menus. By selecting an ordering app button, the integrated menu synced with that ordering app will be displayed.
Tip: Search for items
If your menu has many items, you can easily search for an item by POS ID, product name, or description using the search fields. Simply type in the search field and press enter. If you wish to search across all three categories, enter your search term in the box below Product.

Adding an item to your app menu
You can add a menu item from your POS menu to your connected ordering apps menus using the Link Item button. To access your POS menu, use the tab button navigation at the top of the Menu screen in Doshii Dashboard.

When you link an item from your POS menu to an ordering app, you can customise how the item appears in the ordering app, including:
- Product: the name of your menu item
- Description: a full description of the menu item
- Price: the item price to advertise in your integrated ordering app
- Tags: the category in which the item should be displayed (e.g. Breakfast, Lunch, Starters)
Tip: Keep menu item properties in sync with your POS
When you change the default value for a menu item property, such as its name or price, the overridden property no longer inherits updates from your POS. This means the value you set in Doshii for that property will not be updated if you change the same property for that menu item in your POS.
If you want to keep a menu item property in sync with your POS data, don't override the default value using Doshii's menu management tools.
Adding an image to a menu item
Depending on your POS, your venue may already have images displayed in the POS menu screen of Doshii Dashboard. If this is the case, when you link that item to an integrated app menu, the POS image will be used as the default image in your ordering app for that menu item.

If an item doesn't have an image displayed in your POS menu or you would like to use a different image for your ordering app menus, you can update the default image used by Doshii or set a different image for each of your connected ordering apps.
Updating a menu item image in Doshii does not update the menu item in your POS. The new image will be used in your connected online ordering app menus only.
Adding or replacing the default menu item image
When you add or replace an image for a menu item in your POS menu, the uploaded image becomes the default image used when that item is linked to an ordering app menu.
- Locate the item in your POS menu and select the Upload Image button (camera icon)

- Using the dialog that appears, locate the image file you'd like to use, then click Open.
- The uploaded image will be displayed next to the corresponding menu item.
If the menu item is already linked to an ordering app in Doshii and you have not overridden the menu item's image specifically for that ordering app (see below), the image for the menu item will also be automatically updated in the connected ordering app.
Adding or replacing an app-specific menu item image
If you would like a different image than the default image for a menu item to be displayed in a connected ordering app, you can override the image of an item within the ordering app menu screen.
- Use the tab buttons at the top of the menu screen to select the ordering app menu you'd like to edit.
- Locate the item in your POS menu and select the Upload Image button (camera icon)

- Using the dialog that appears, locate the image file you'd like to use, then click Open.
- The uploaded image will be displayed next to the corresponding menu item. This image is specific to your ordering app and will not change unless you repeat the above process with a different image.