How to Simulate a POS-Initiated Payment
You can simulate the Pos-Initiated Payment Sequence using the trial Sandbox Dashboard.
1. Login to the trial Dashboard, select one of your test venues, and click on the  (health) icon to go to its Health page.

2. Submit an order by clicking the  (submit order) icon. Prior to clicking on
 ![]() amend the payload to remove the transactions payload.
amend the payload to remove the transactions payload.


Now, press ![]() . A new order should be created, without any transactions against it.
. A new order should be created, without any transactions against it.
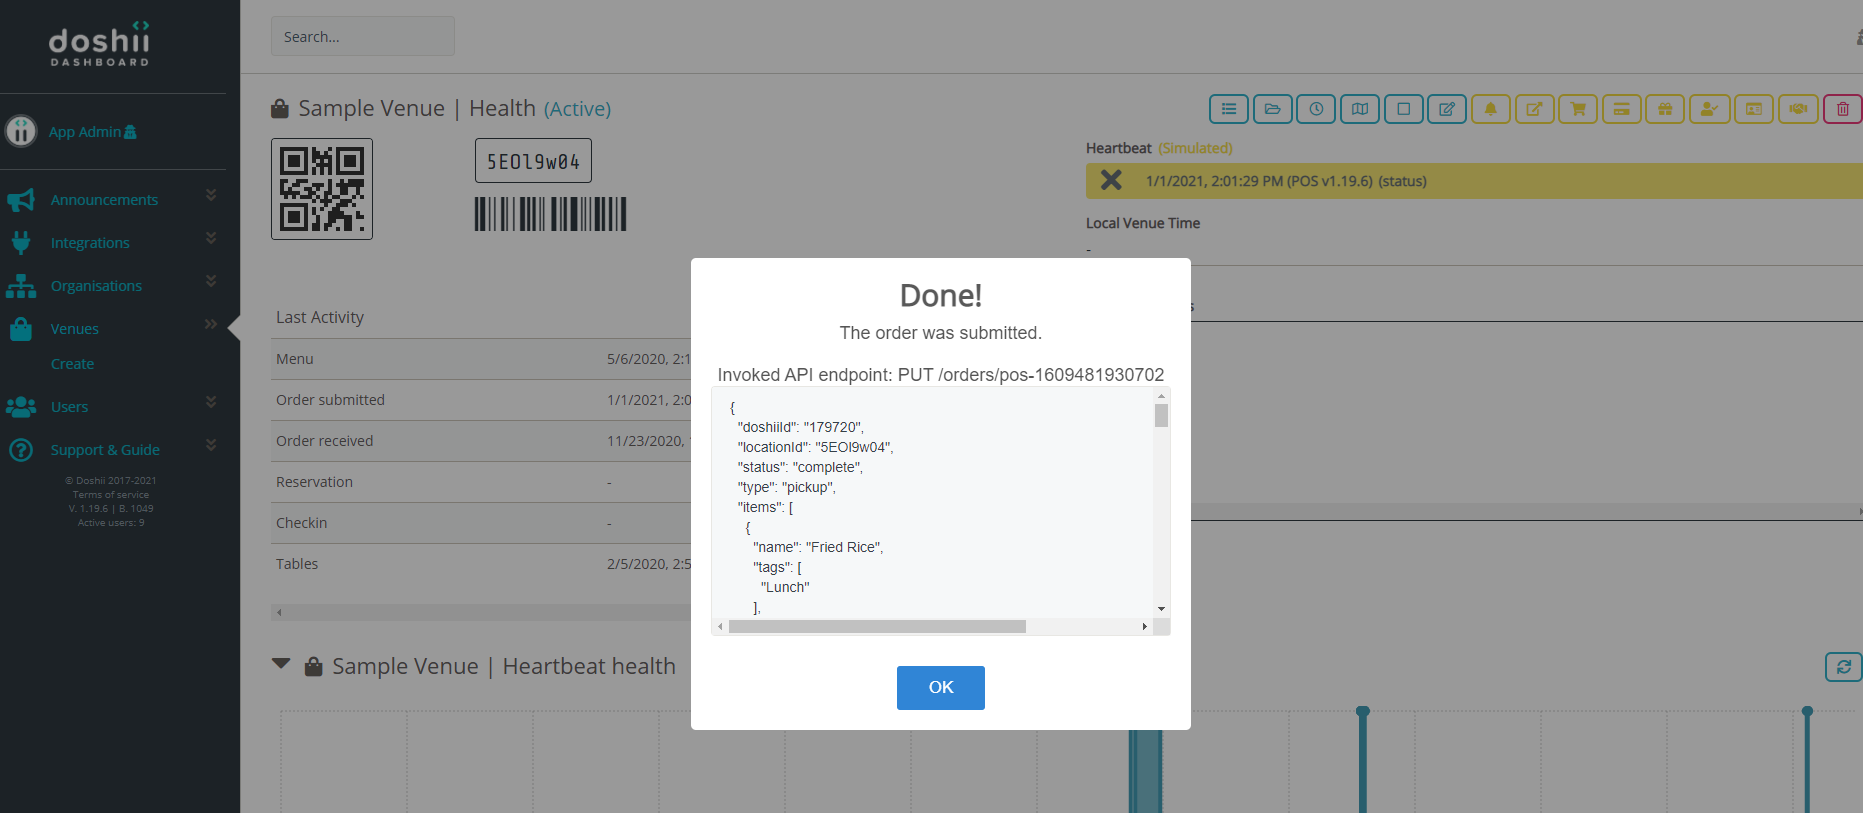
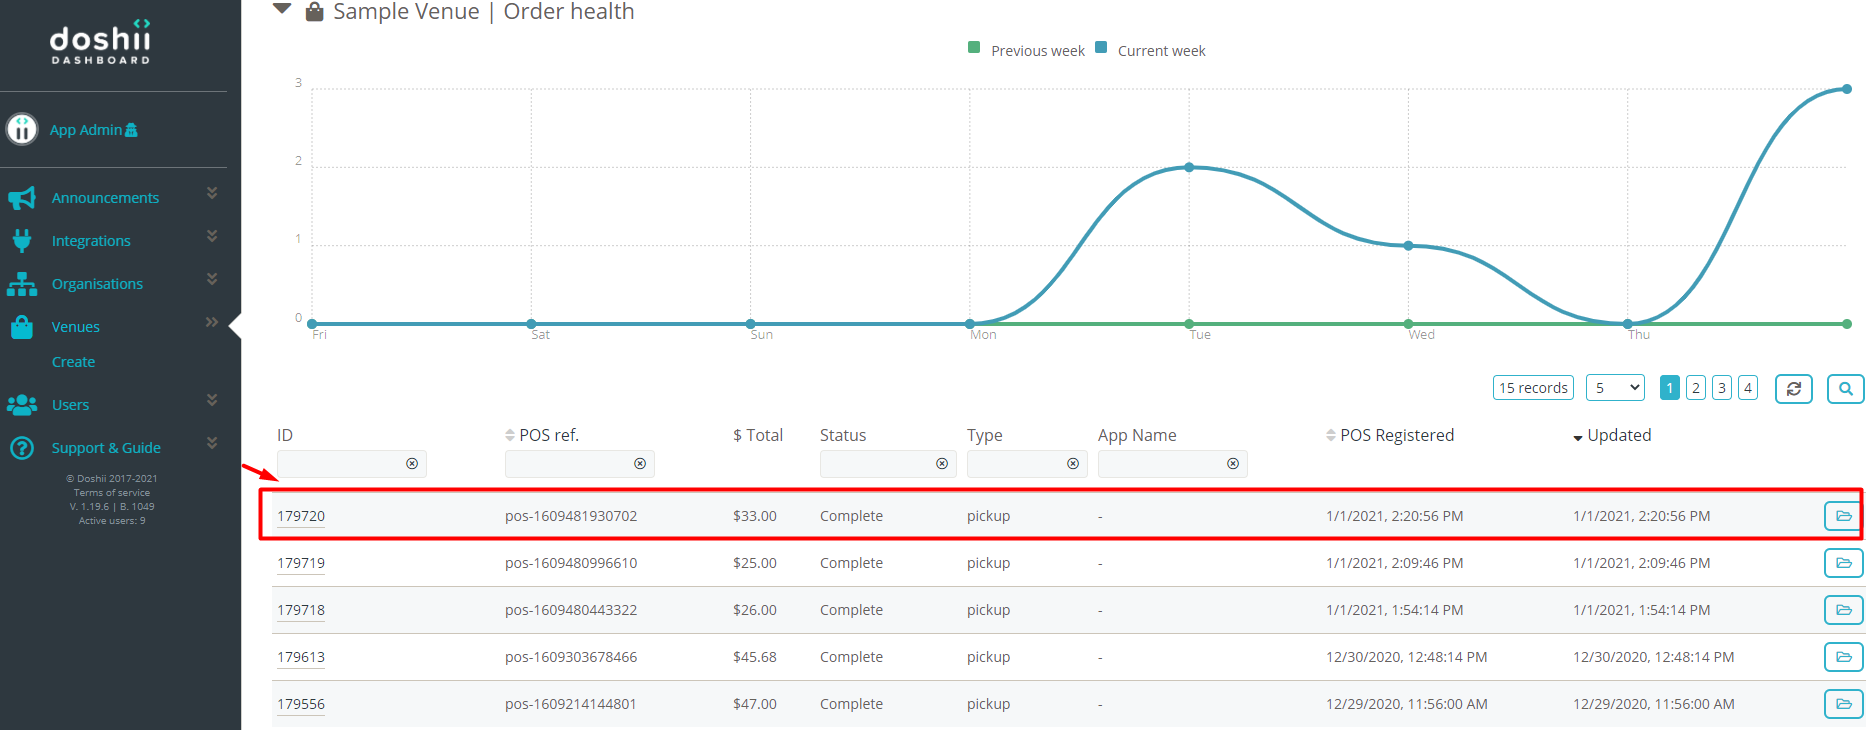
Click on the  (details) icon.
3. Click on the  (create payment) icon to submit a transaction payload.
The status will change to "requested" after selecting the App for PIP payment provider. This will create a Blocking request.
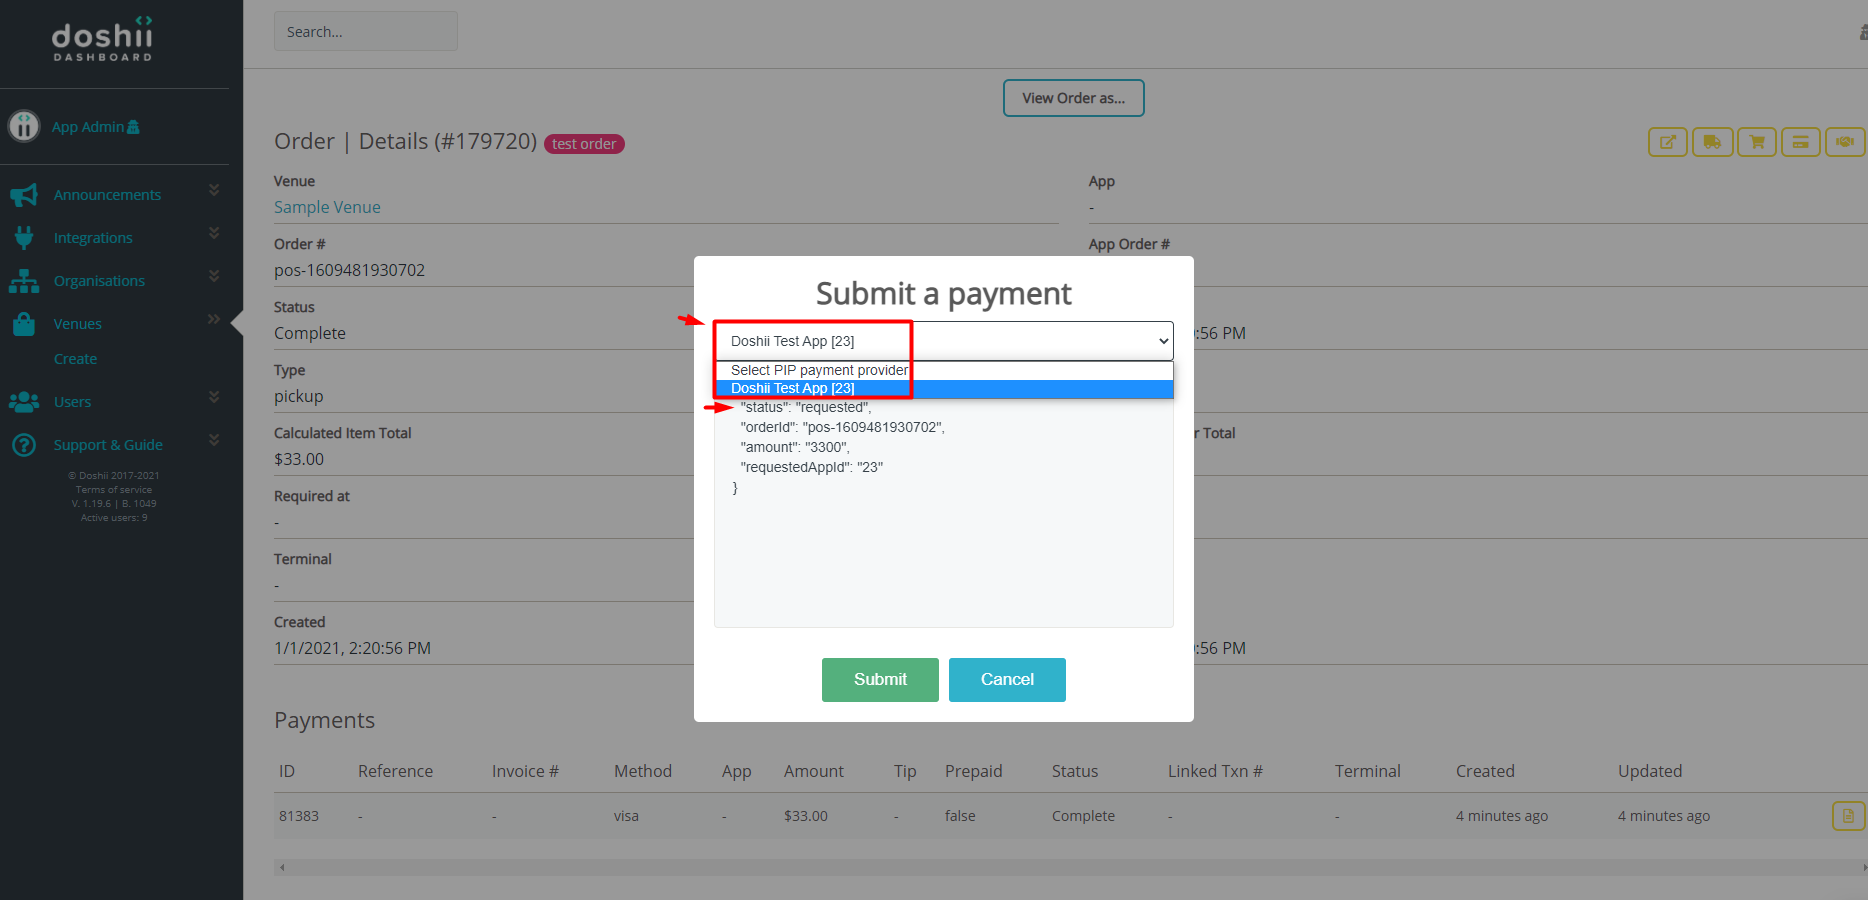

Click on ![]()
4. Open the App (Doshii Test App) you selected to request payment from on another window or tab and click on the  (health icon) to see the Real-time events.
5. Your App should receive the transaction_created event.
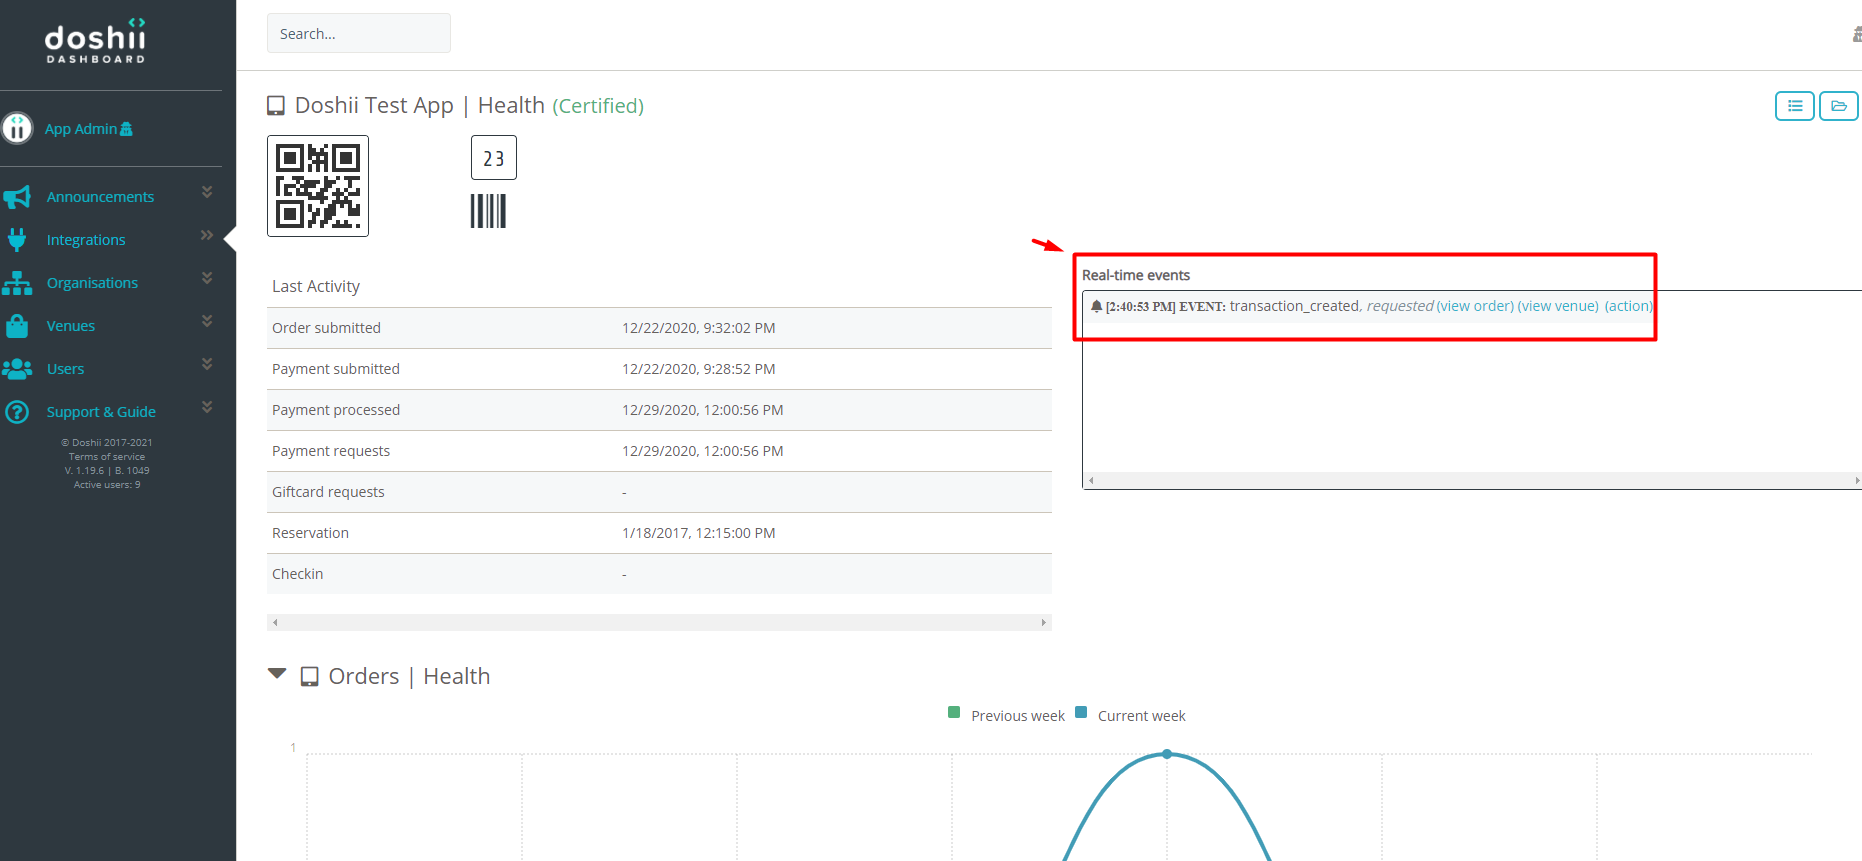
Use your app to respond with a status of pending


6. Once the payment is in a pending state, Go back to to the other tab or window of Trial Dashboard to view the order on "venue view". To make sure the order is being viewed on venue view, click on "View order as" on top of the page and make sure the check is on the venue's name then update the payment status to a waiting state.
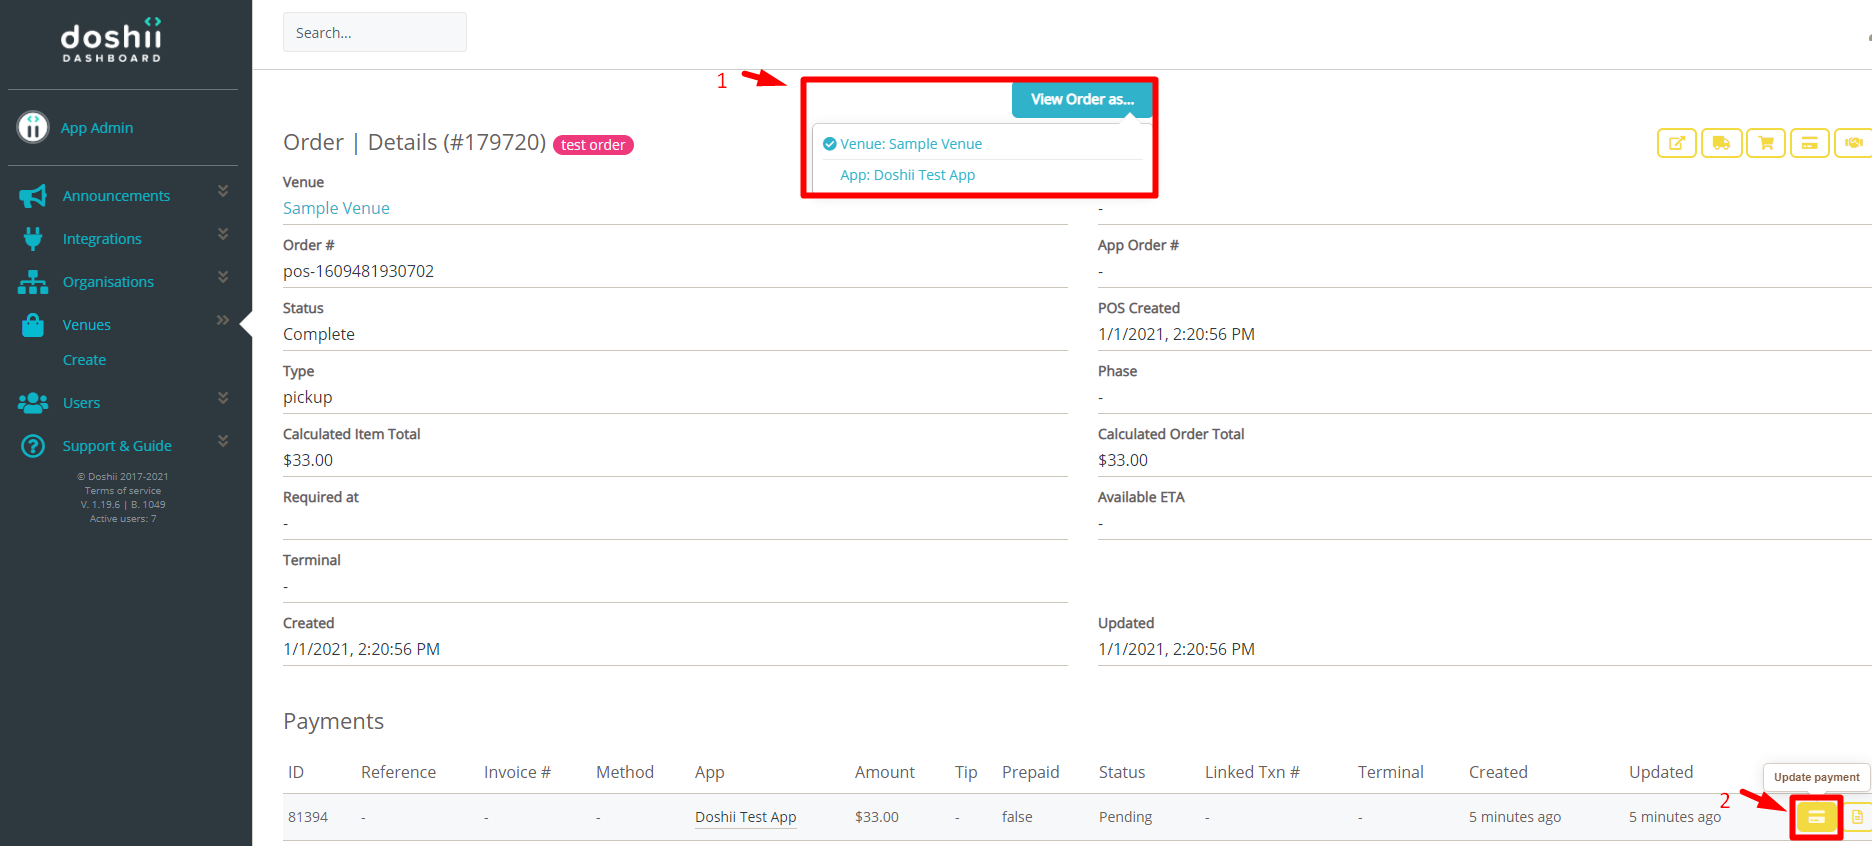

This will create a Blocking request again and just click on ![]() .
.

7. Proceed to process the payment using your App, and updating the status to complete.
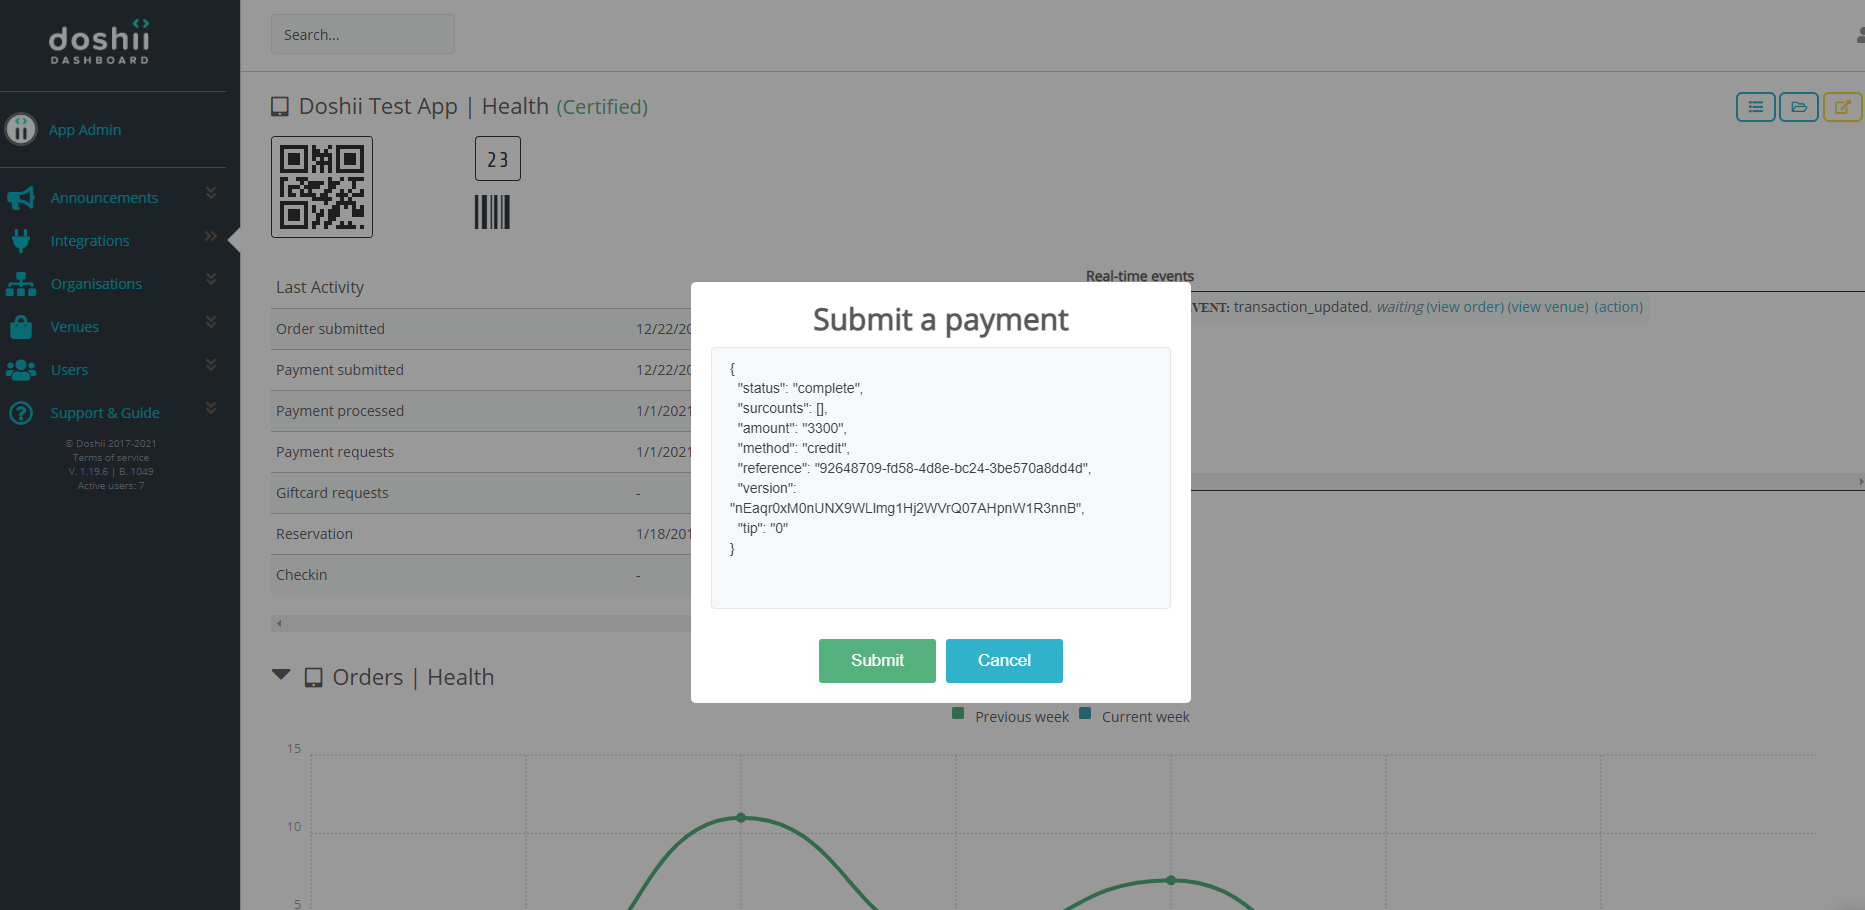

The order should now show a "Payment" with complete state.
