Doshii Menu Management for Venues and Apps
Managing the menu between the Point of Sale (POS) and the different Apps a venue chooses to use can be quite complex and time consuming. From an integration perspective, any order submitted via Doshii simply needs an associated posId to be provided, and the POS will identify the menu item and display it appropriately on printer dockets and bump screens. However, presenting menu information to end consumers of Apps can become difficult; especially when a venue has multiple ordering Apps with different requirements around pricing, imagery, item descriptions and variant options.
To help simplify menu curation for both the Venues and the Apps, Doshii has designed Menu Management. Using Doshii's Menu Management, venue managers can easily see the menu items they sell on the POS and customise these items as necessary on an App by App basis.
The key functionalities enable Venue Managers to:
- Select the items specifically available for sale via an App
- Customise the menu item descriptions to make them more end consumer friendly
- Customise the menu item category (tags) for the App
- Select different images to display for menu items, and have all digital media available from one place for all Apps
- Customise the menu item variants (modifiers) available for selection via an App
- Customise the price of a menu item specific to the App
Additionally, when menu item changes occur on the POS, these are reflected in Doshii and the changes are notified to the Apps, so they can be picked up immediately without further changes.
Using Doshii's Menu Management, Venue Managers can streamline App onboarding, and reduce the time it takes to perform initial setups. Additionally, changes need to be made in one system, and be reflected across all Apps as required. All resources are kept in one, centralised place. All menu configuration is performed in one, centralised place.
- Customising an Item for an App
- Adding image resources to a menu item
- Upload Image Resources to an App's Menu
How Apps Can Use Menu Management
- Implement the Doshii Menu API
- Request
- Receiving Menu Item Notifications
How to Use the Functionality
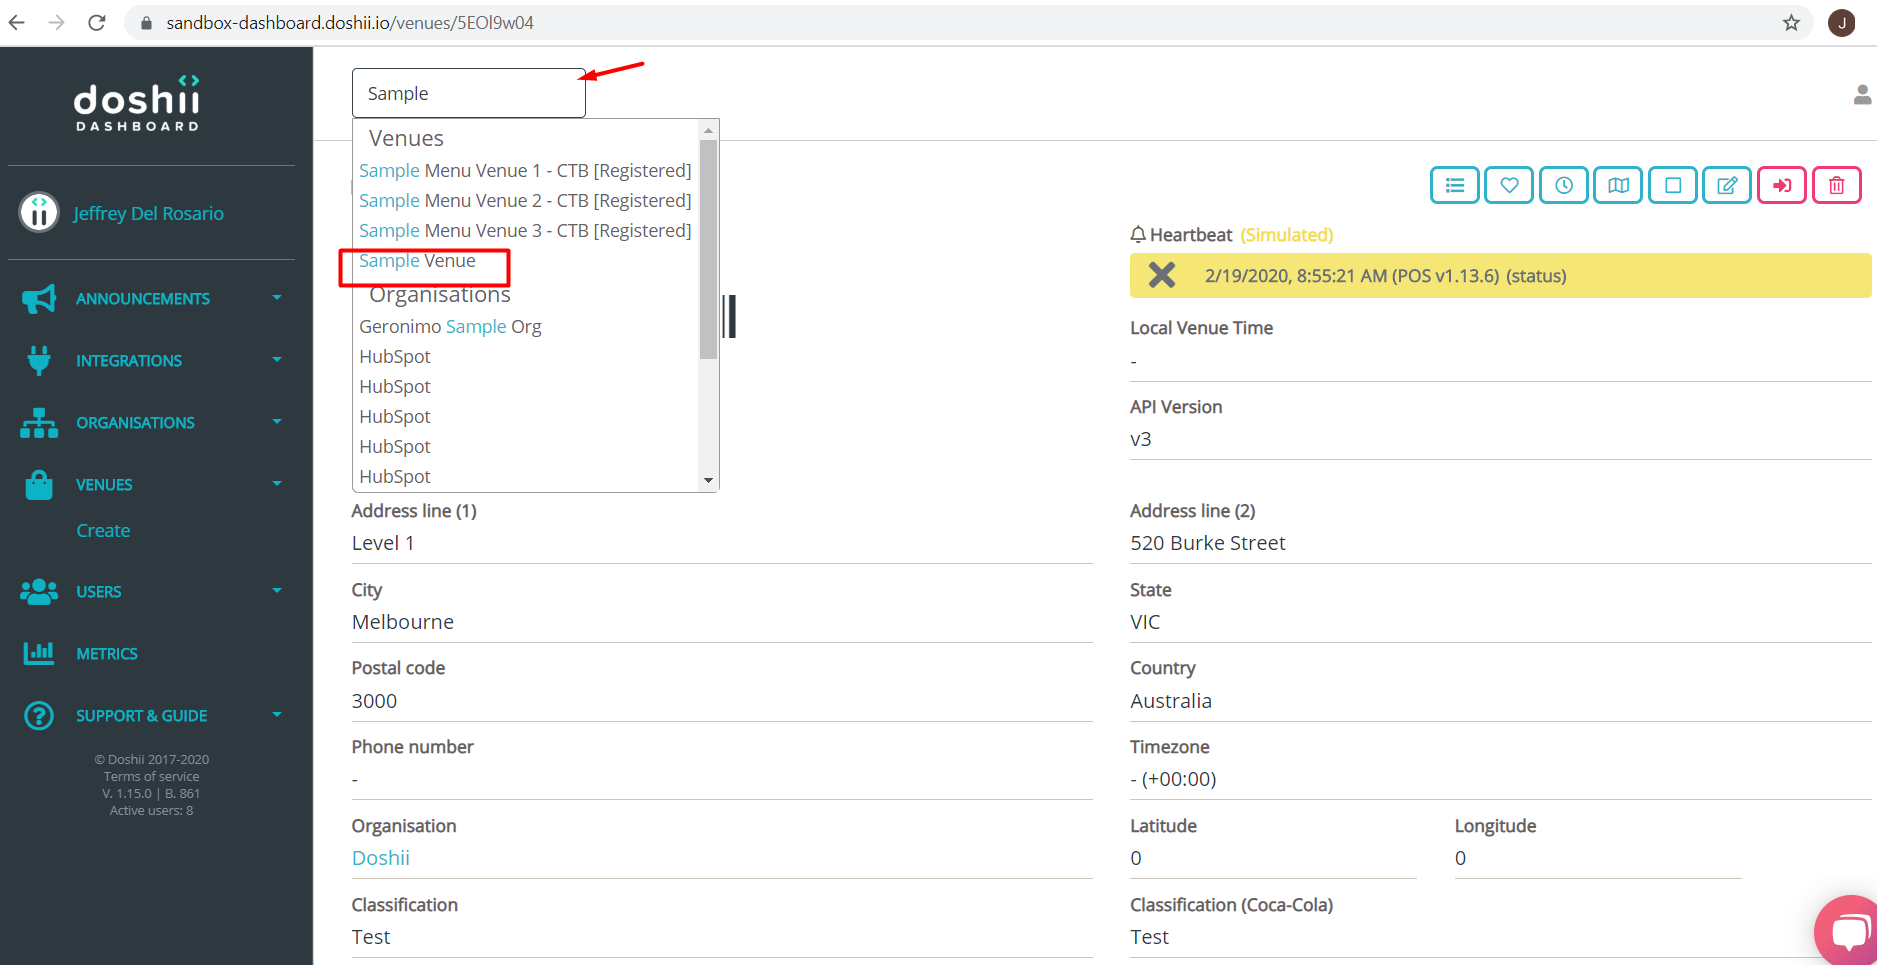
1. Functionality is available from the Doshii Dashboard's Venue Details Page. Use the Search Box on the upper left hand side of the page to search for the venue. If you have access to it, the venue will appear and the link will direct you to its Details page.
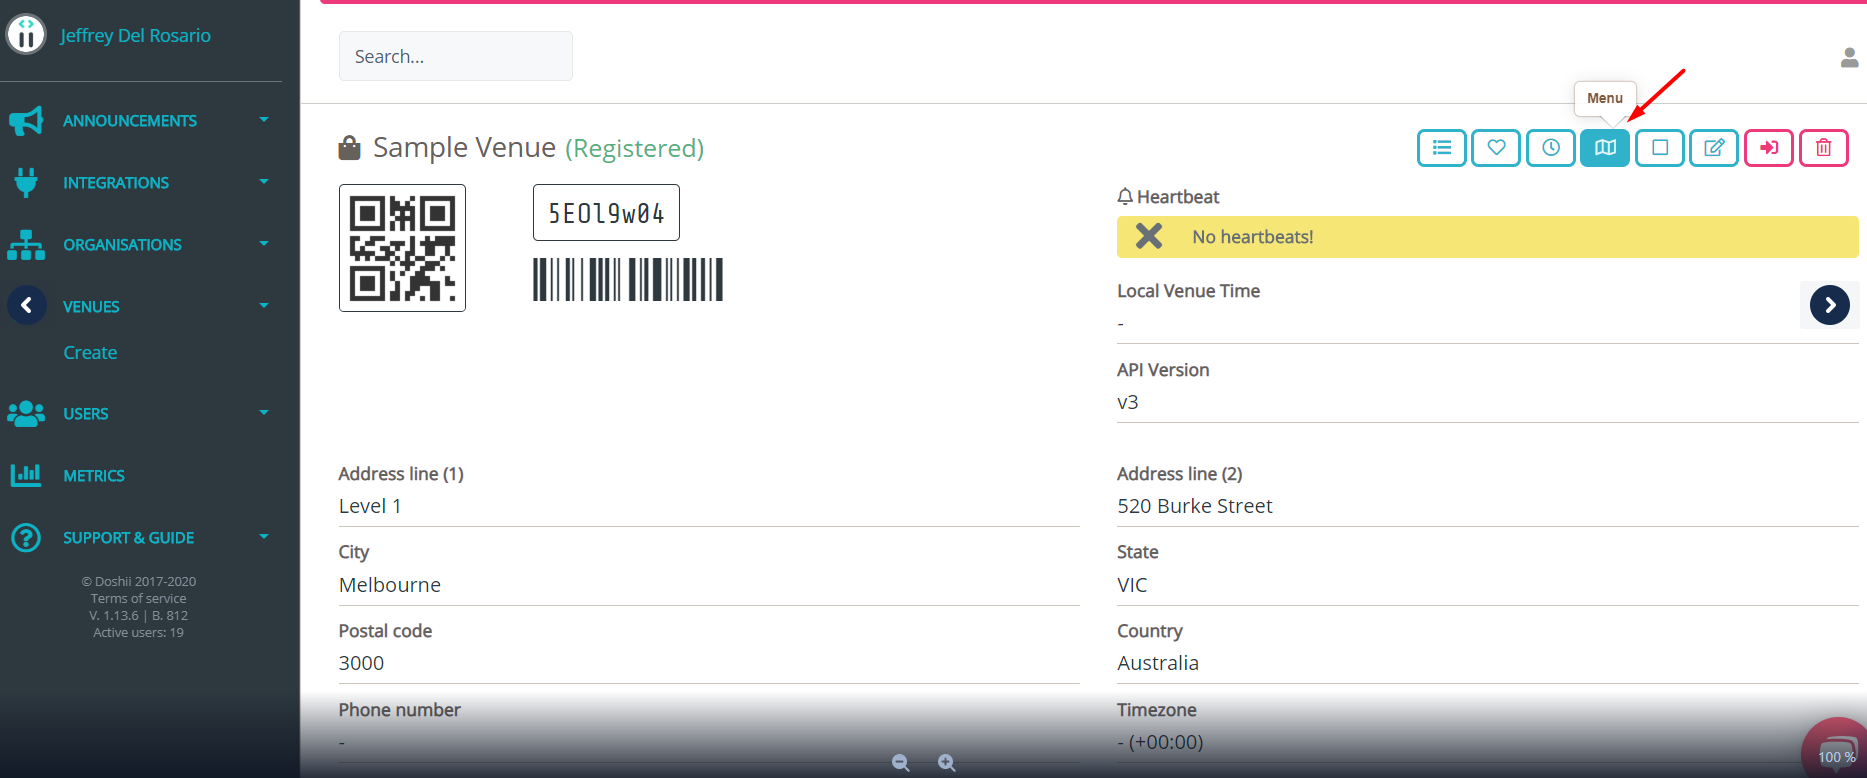
2. On the venue details page, click on the Menu icon on the upper right hand side to display the venue’s menu.
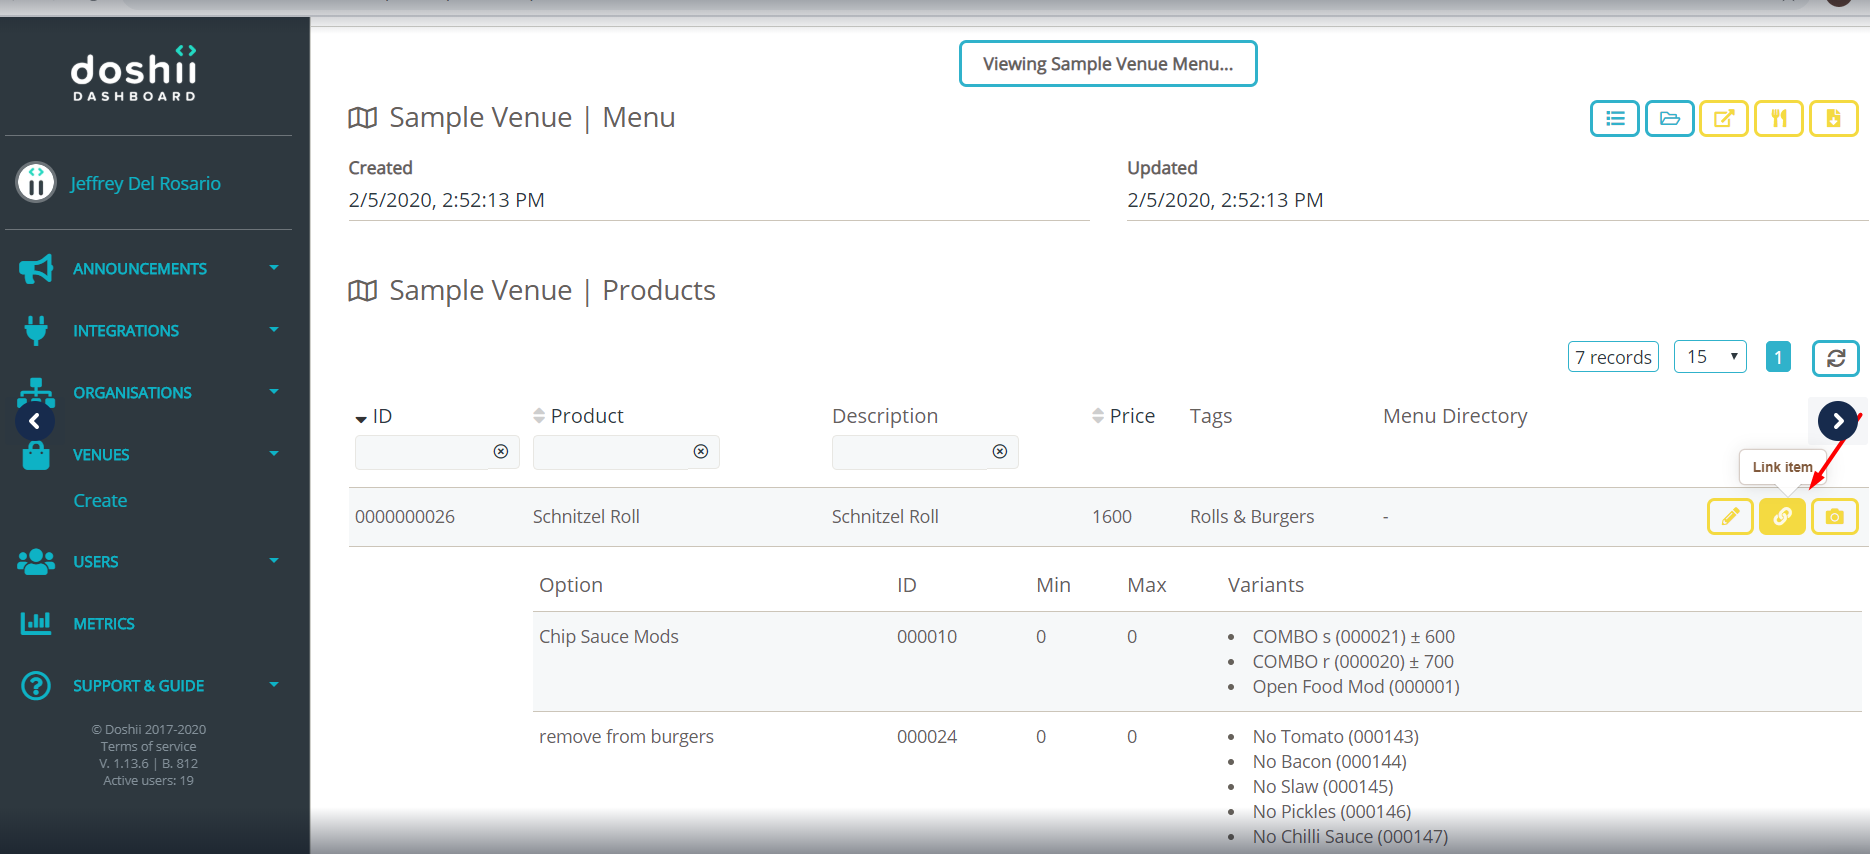
4. Next to each menu item you will see option icons, which allow you to perform a specific Menu Management function. These options are only available to an App Admin role users and an Organisation Admin role would see a different option or no access to these options.
App Admin Role users view:

 - to upload an image resource against the menu item.
 - use to link an item from venue's menu to a specific App's menu.
Customising an Item for an App
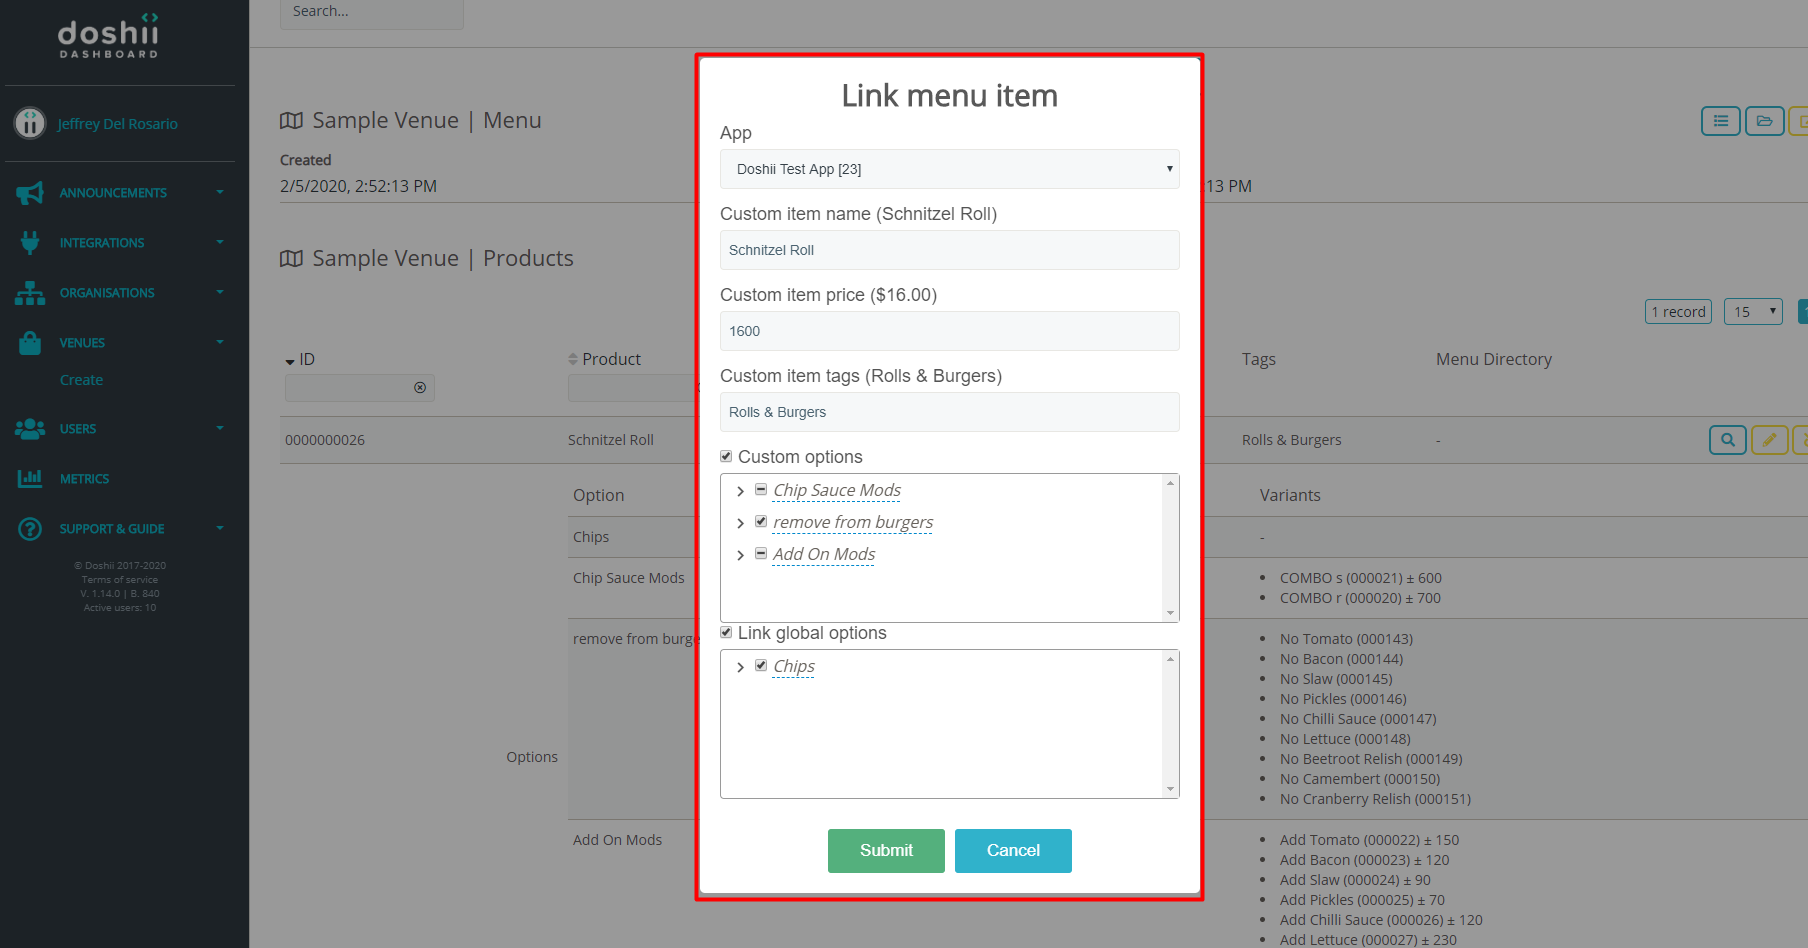
1. Clicking on the Link Item option button will provide you with additional options. First, select the App that you are linking the item to.
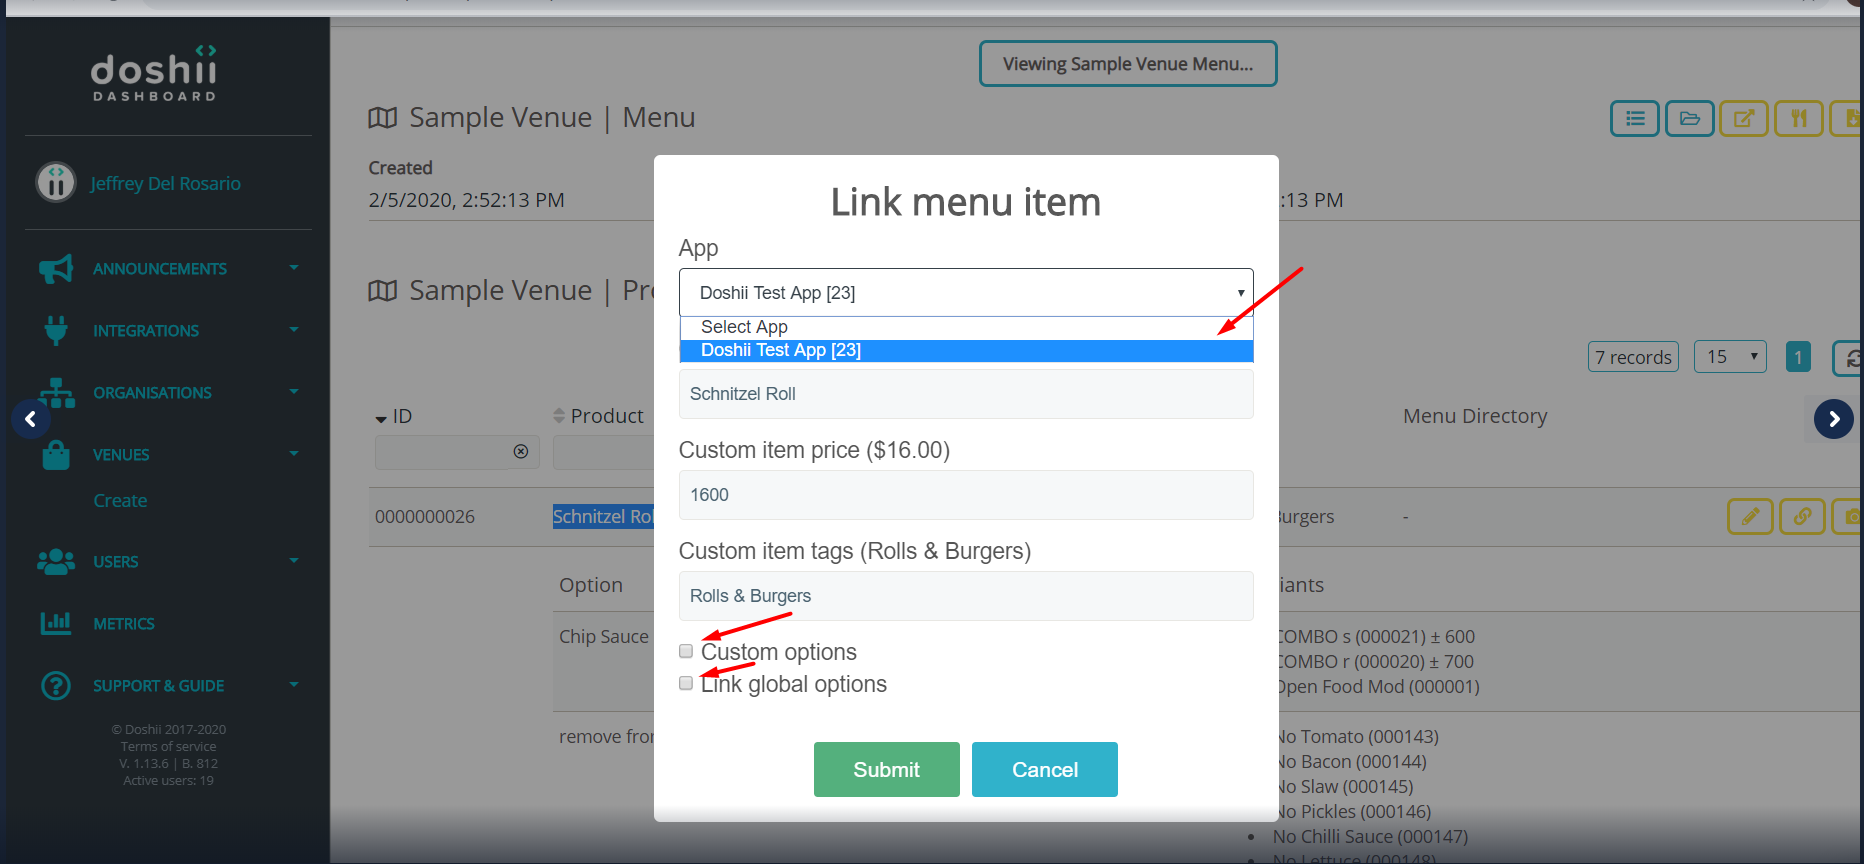
Custom Item name - you may put a modified name for an item.
Custom Item price - to customise item price.
Custom Item tags - to categorise an item for the App ex: burgers, beverages or dessert.
Custom and Global options - .Custom Option will give us such modification we want to an item on a menu ex: remove/ add sauce, ingredients depending on the set of modifiers exist. Global Options on the other hand is like 'add ons' to be added on an existing item/ menu ex: add Fries. These mostly appear as item variants or modifiers of the item once saved after linking an item.
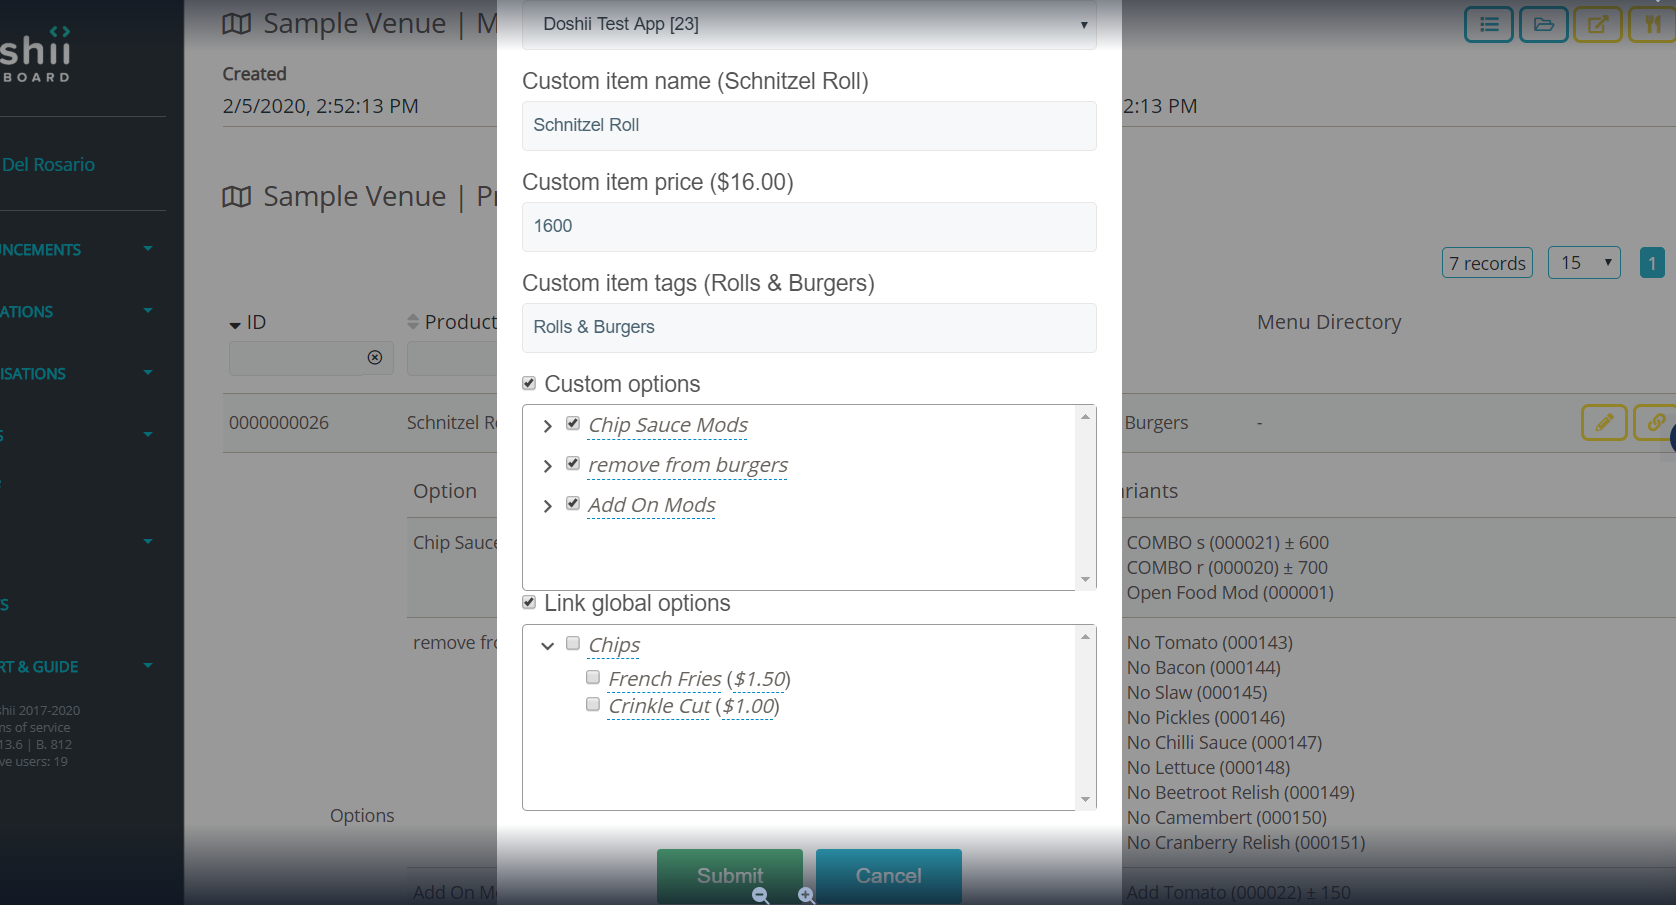
2. Click on Submit once customisations have been complete. To see the changes reflected on the App's menu you can Select to view the App menu
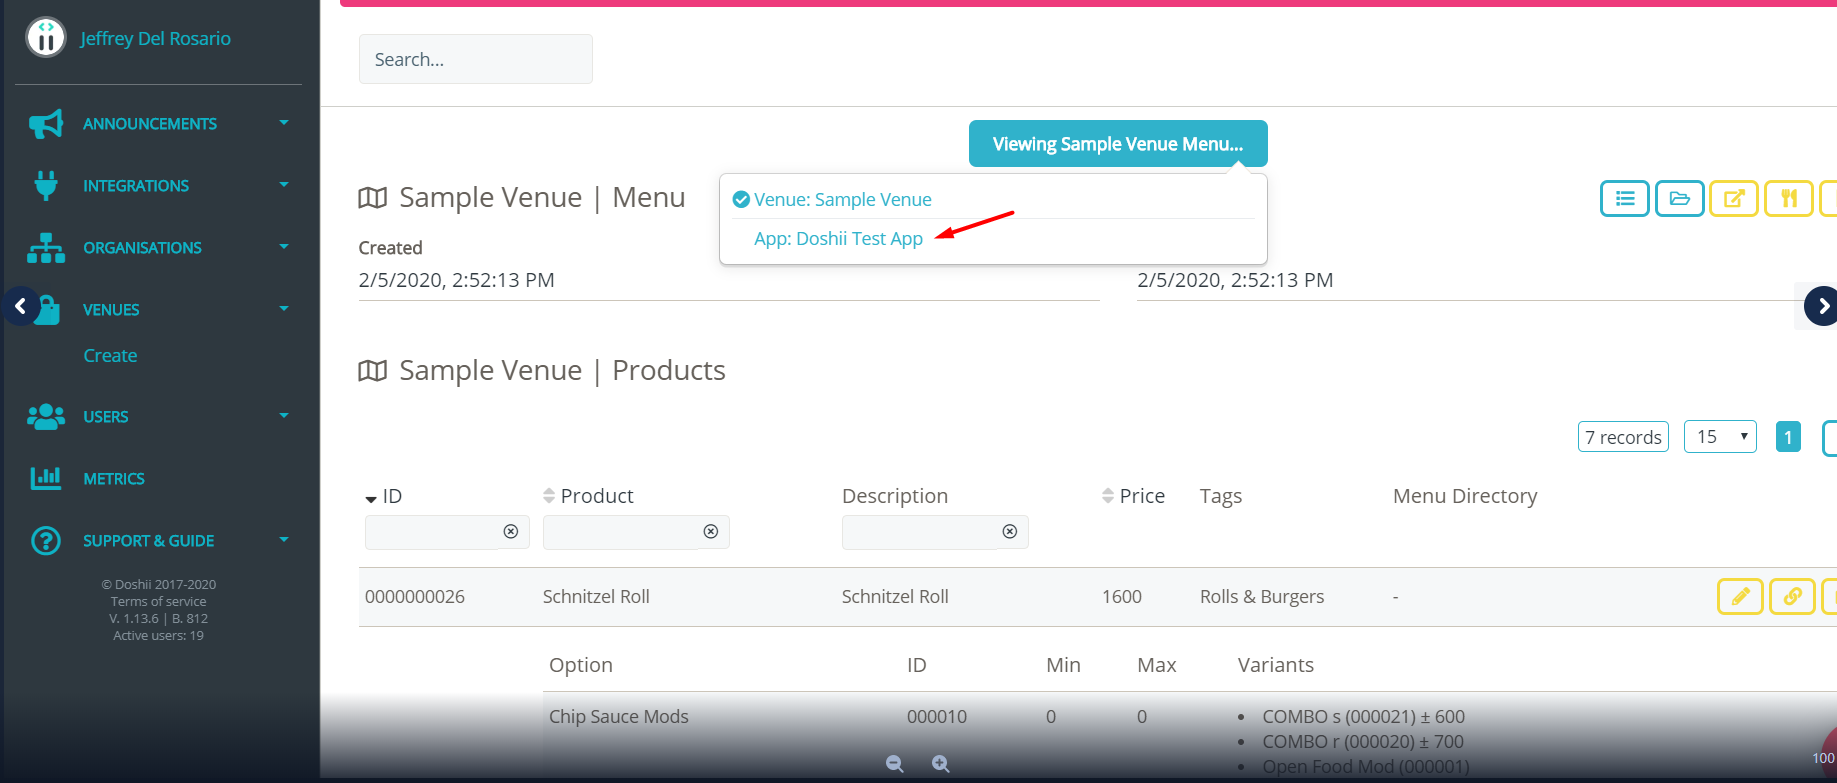
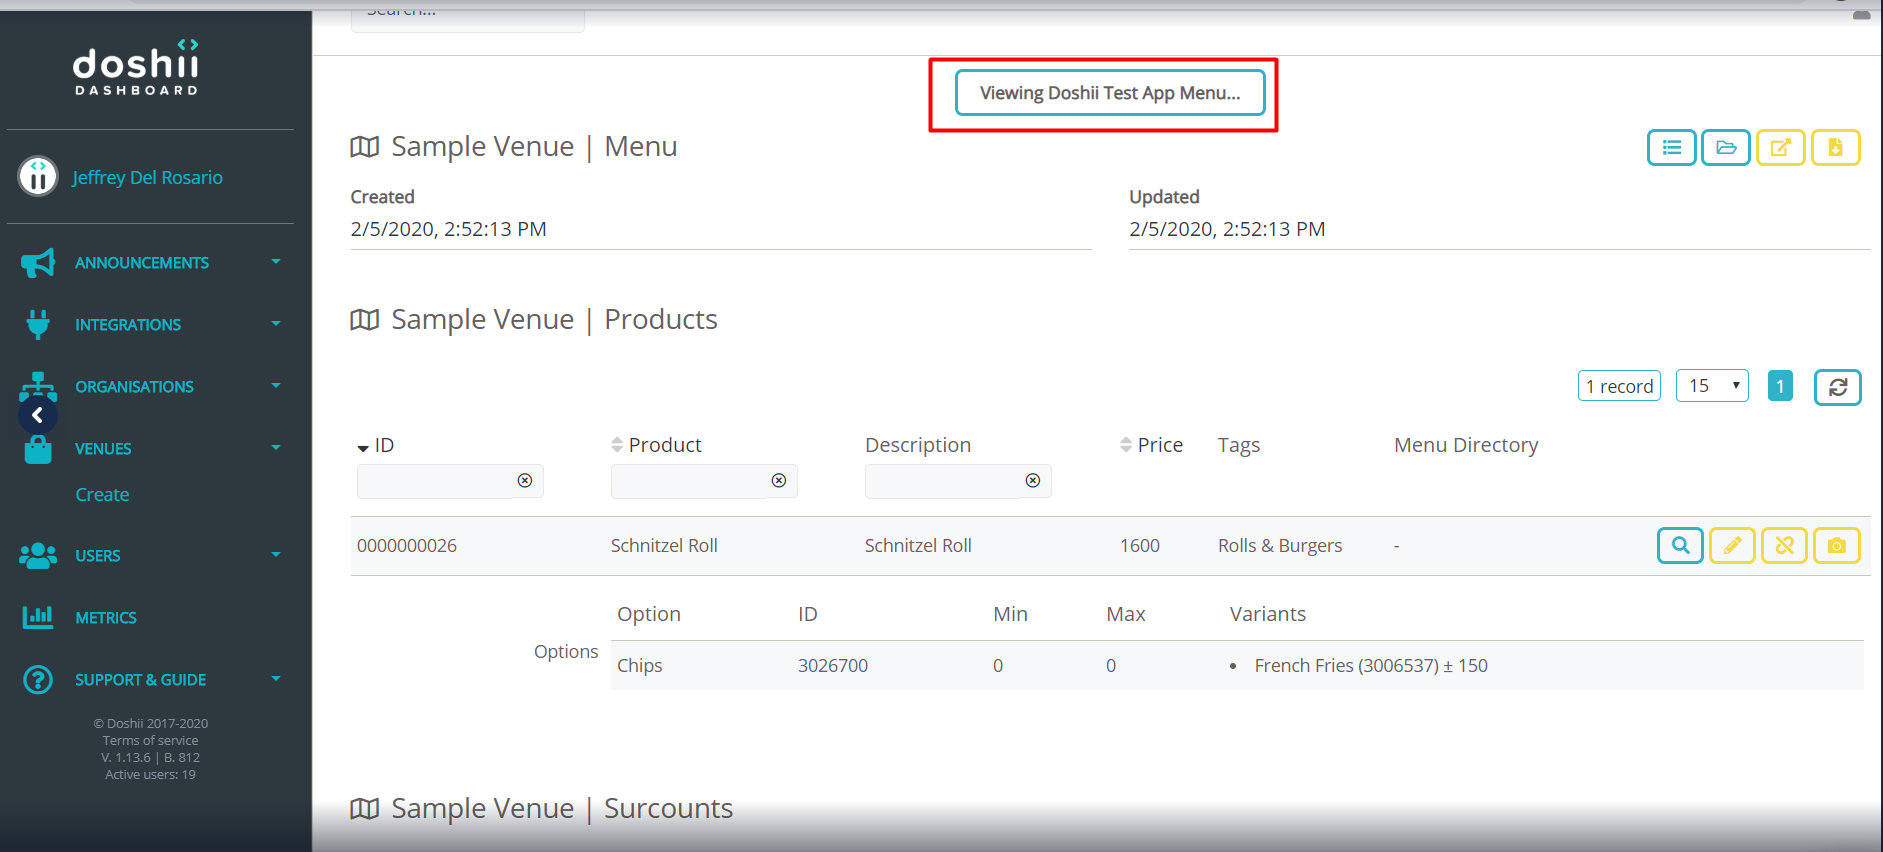
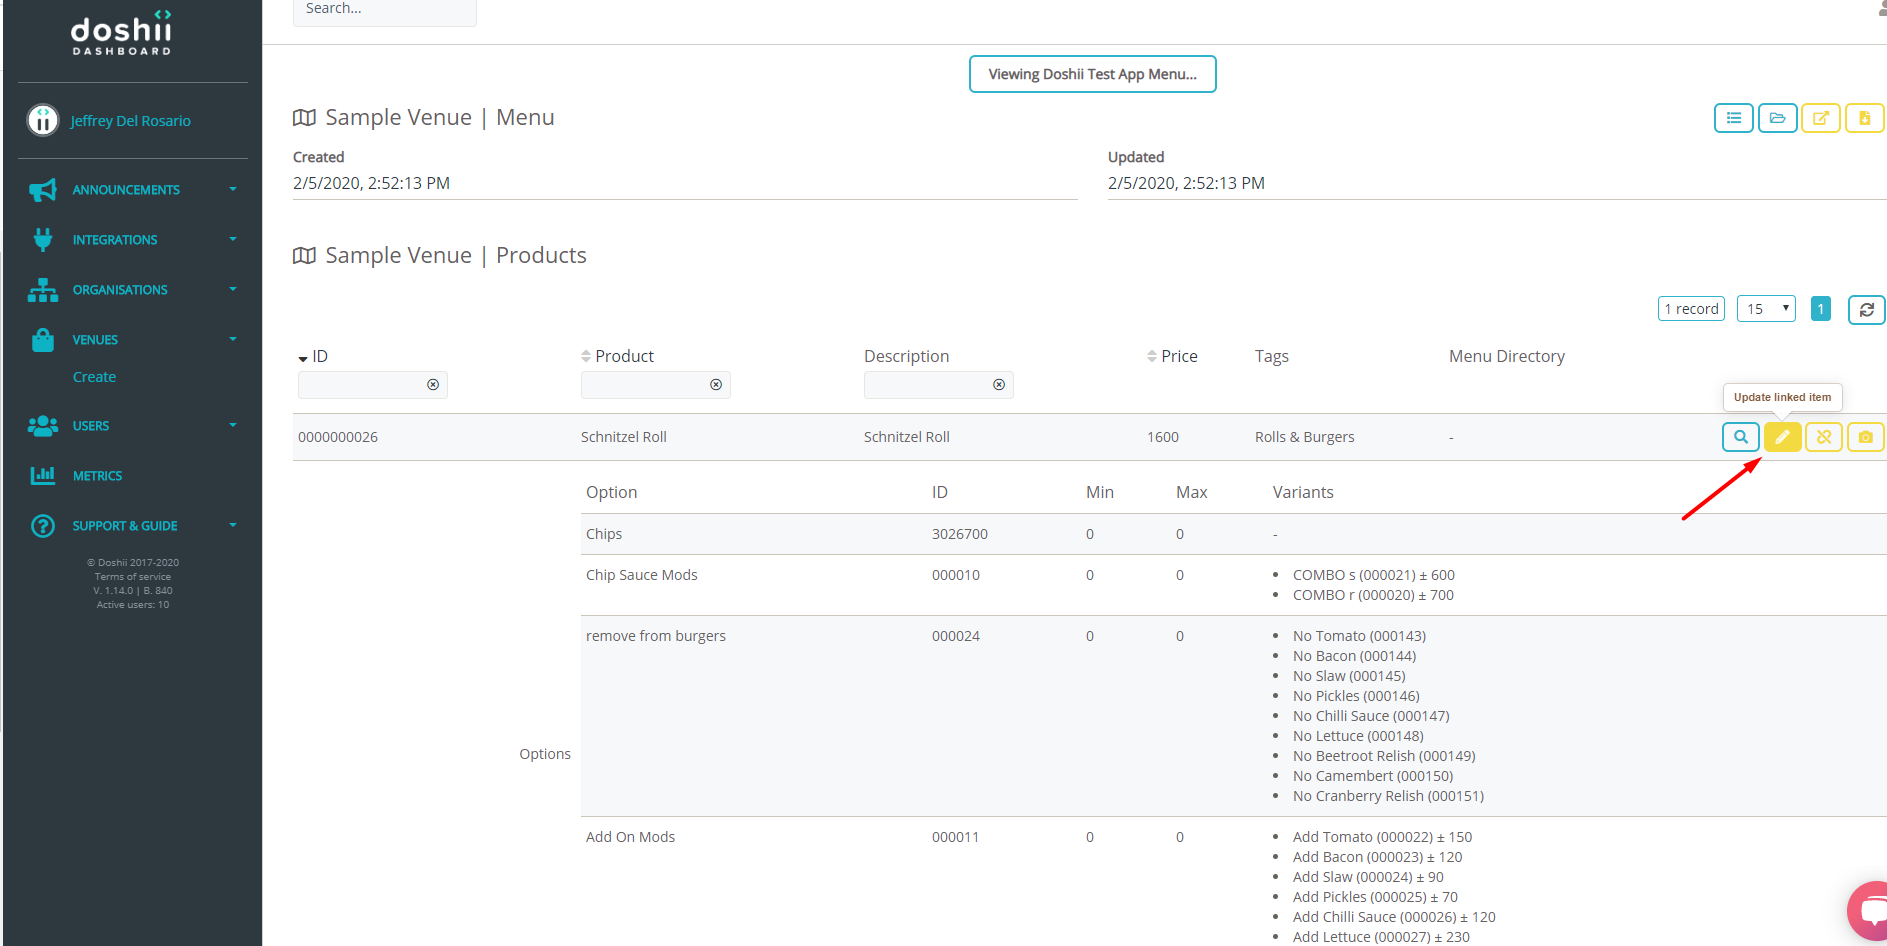
3. You may also modify linked items on App menu view. Click on the update linked item icon next to an item. Link menu item window will come up and you may choose customised item name, price and tags including custom options and link global options.
Adding image resources to a menu item
1. Click the Upload image icon found next to the item details. In this case we will be using Schnitzel Roll.
2. After clicking the Upload image icon the File Explorer will prompt to select the file for upload.
3. After selecting the image resource and uploading the image will appear under the menu item
Upload Image Resources to an App's Menu
To upload an image to App Menu, switch the Menu View from Venue to the appropriate App.
Perform the same steps as above to upload the images as needed.
How Apps Can Use Menu Management
To use Menu Management in an App, developers need to implement the Doshii Menu API, and additionally use Doshii's Real Time Event Notifications to act on specific Menu Management events when they occur.
Implement the Doshii Menu API
To retrieve the App version of the venue's Menu you need to use the standard GET ~/menu endpoint, with the filtered=true query paramter.
Request
GET /v3/locations/9YwAdZJD/menu?filtered HTTP/1.1
Response
  {
   "products": [{
 "name": "Toast",
 "tags": [
 "FOOD"
 ],
 "type": "single",
 "posId": "0009329",
 "options": [],
 "surcounts": [],
 "unitPrice": "700",
 "description": "Toast",
 "includedItems": []
 }],
   "options": [],
   "surcounts": [],
   "version": "9LOpdzakZ4SNRB3lbz27c8Eo9No685In57110yaK",
   "uri": "http://.doshii.co/partner/v3/locations/9YwAxxxx/menu?filtered",
   "createdAt": "2020-03-17T12:30:42.976Z",
   "updatedAt": "2020-03-17T12:30:42.976Z"
 }
Receiving Menu Item Notifications
Additionally, using the Doshii Real Time Event Notifications you should ensure to listen for the following events: