- Connecting using the Dashboard
Suggested actions to onboard a venue
- Retrieving the Menu from a Venue
- Retrieve tables from the venue
- Retrieving POS Terminals from the venue
The next steps in your App development
Connecting to a Venue
Connecting to Doshii gives you the opportunity to connect with thousands of venues! However, to begin interacting with a venue you need to first connect to it. This will grant your App access to use all the Doshii APIs your App is certified for to interact with the venue, so that you can:
- Obtain the venue's menu and tables
- Submit orders using the Ordering API
- Make payments using the Payments API
- Use the Loyalty API with the venue
- Make bookings with the Bookings API
- View venue details, such as their trading hours.
- Obtain orders from the venue for analytics
There are two ways your app may be connected to a venue:
- Referral Connection process - recommended & preferred method
- Manual Connection process - for legacy apps and as a back-up
Referred connection
If the venue accepts the referral, your App will be connected automatically and you will be notified.
You can view the progress of any outstanding referrals via the Doshii Dashboard under your App's "App Referrals" section.
Manual connection
There are two ways to manually connect to the venue:
- Doshii API - recommended, as required per Certification
- Dashboard - as a fallback
Both methods require the venue's Doshii LocationId which you will need to obtain of the venue.
To obtain the venue's Doshii LocationID you may need to speak directly with the venue. Please ask the venue to read our guide on how to find their Location ID if they are unsure.
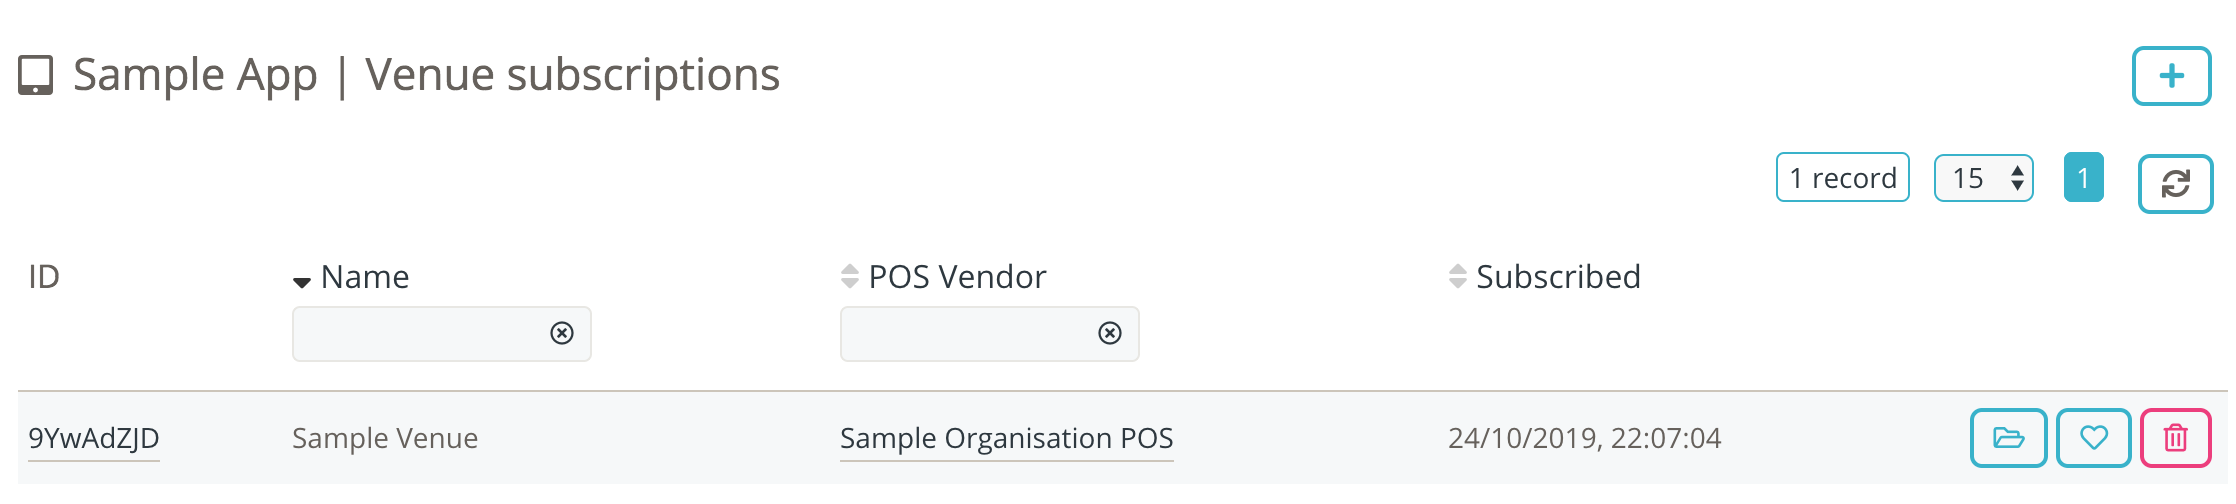
Connecting using the Dashboard
You can use the Doshii Dashboard to connect to venues, using the LocationId.
Follow these steps
- Login to the Doshii Dashboard. For the sandbox (trial) environment, use https://sandbox-dashboard.doshii.io. For the live environment, use https://dashboard.doshii.io
- From the sidebar navigation select Integrations
- Under the Apps list, click on the Details icon next to the App you would like to connect to the venue.
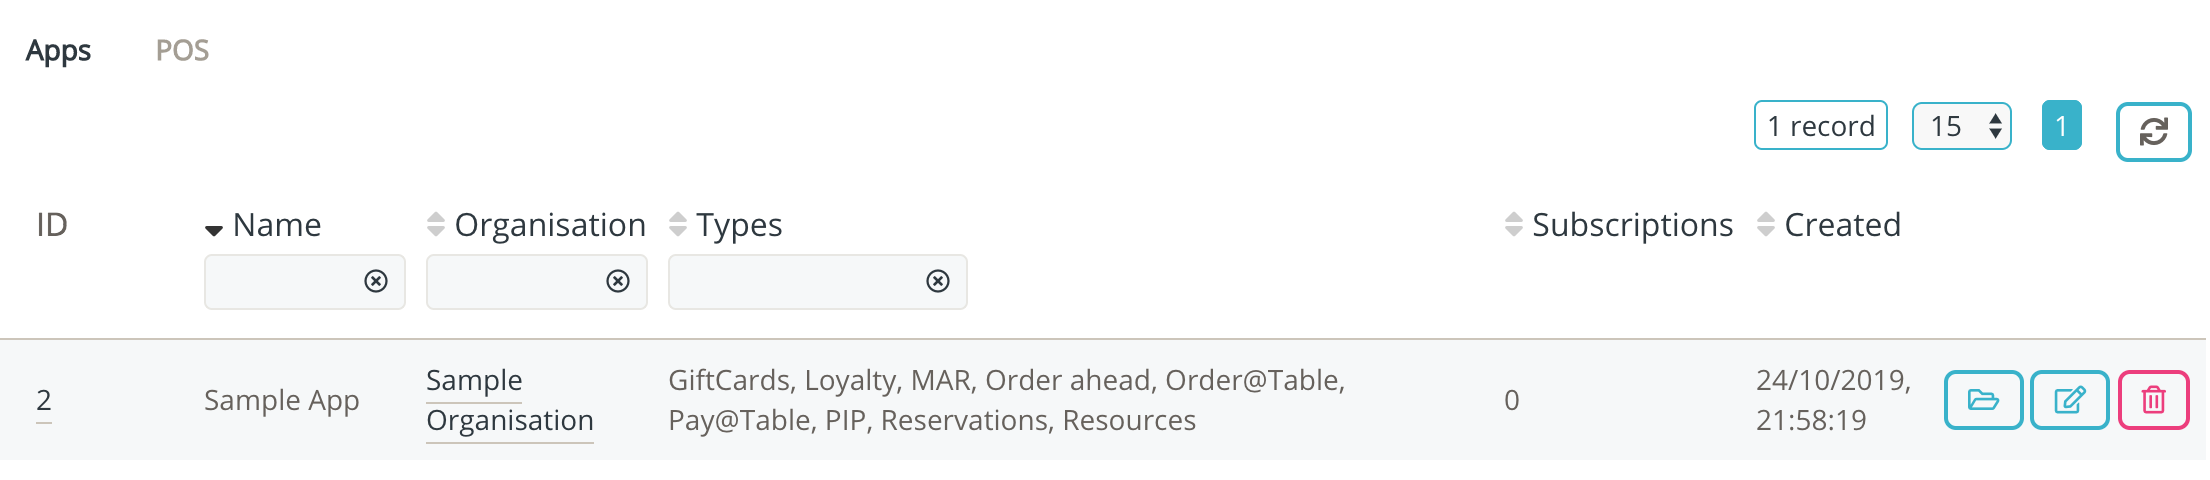 This will lead you to your App's Details Page
 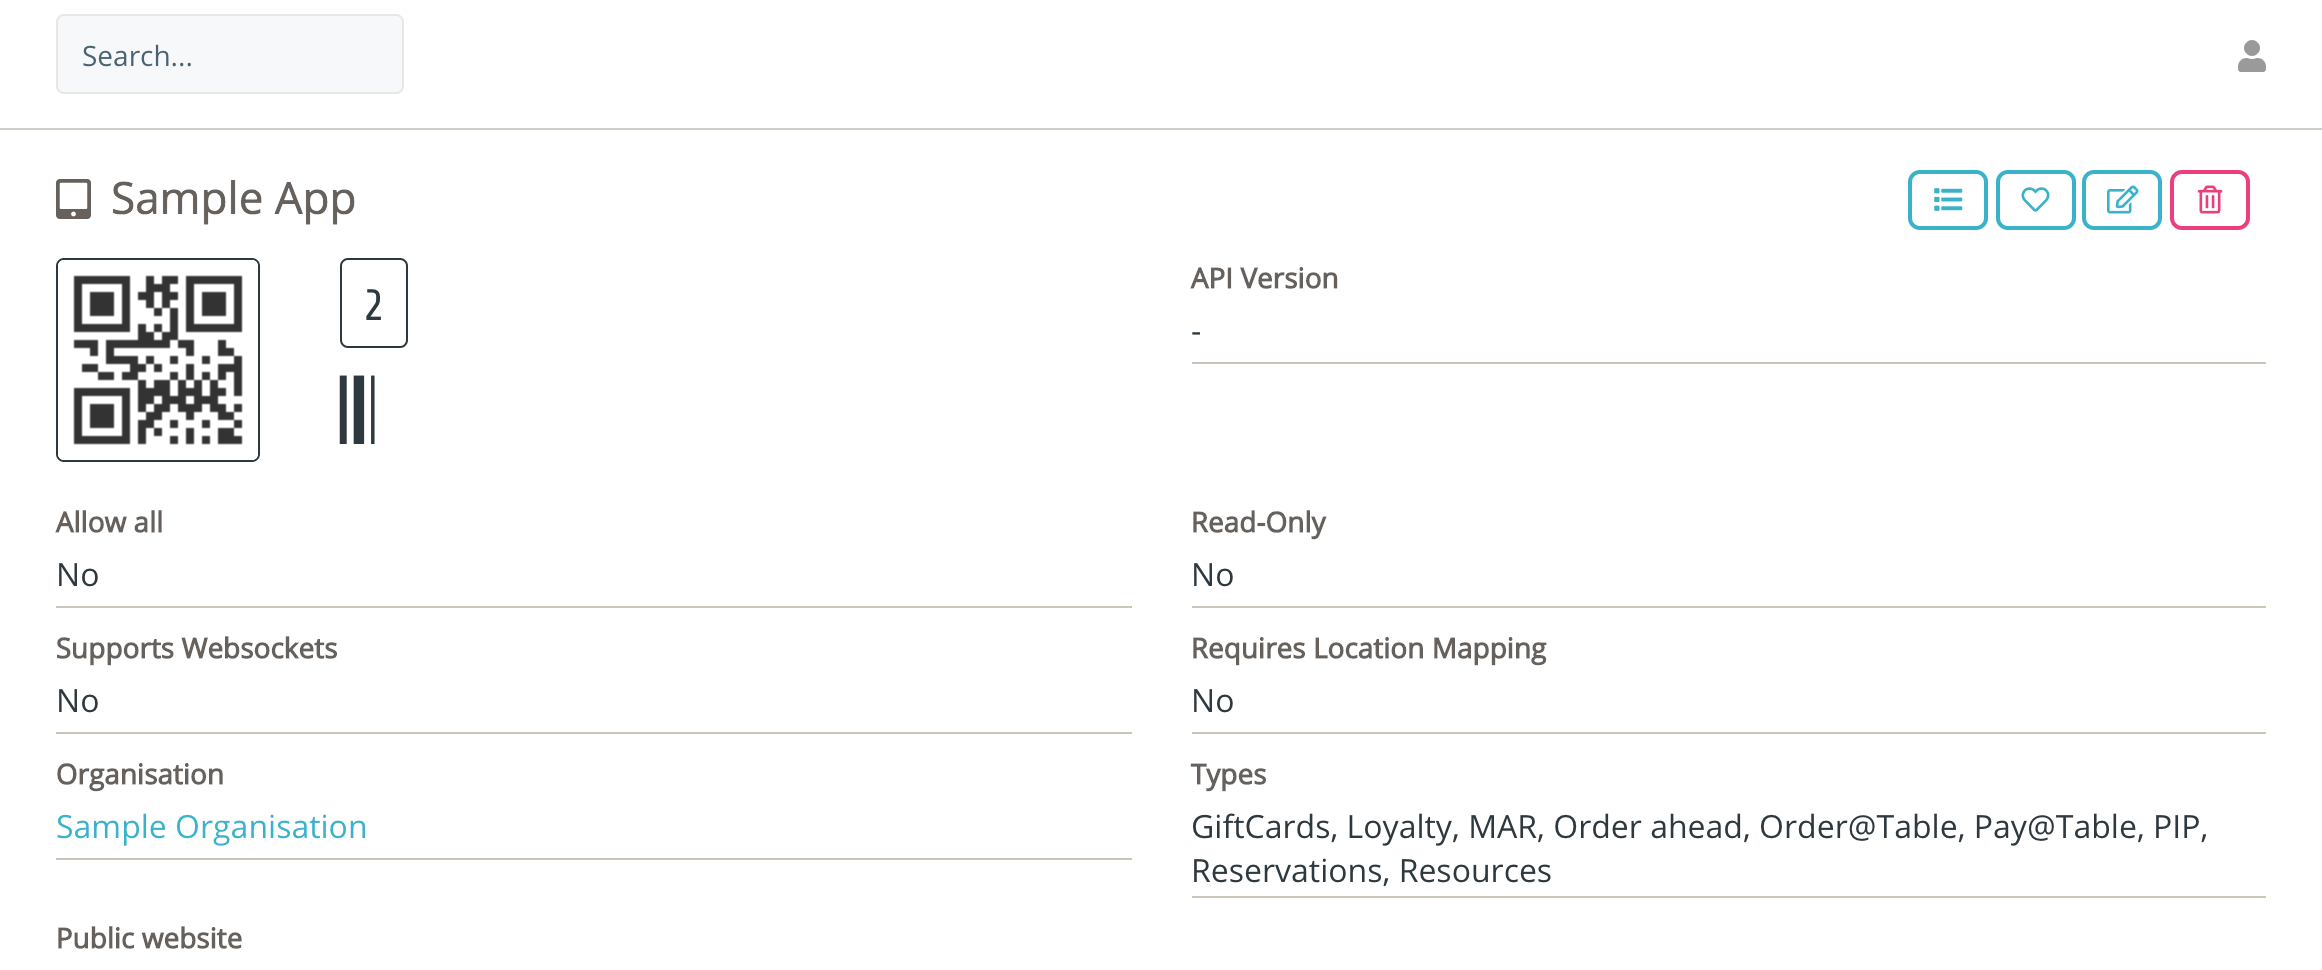 Hint: You can bookmark the URL for your App.
 - Scroll to the Venue Subscriptions list and click on the Subscribe Venue icon

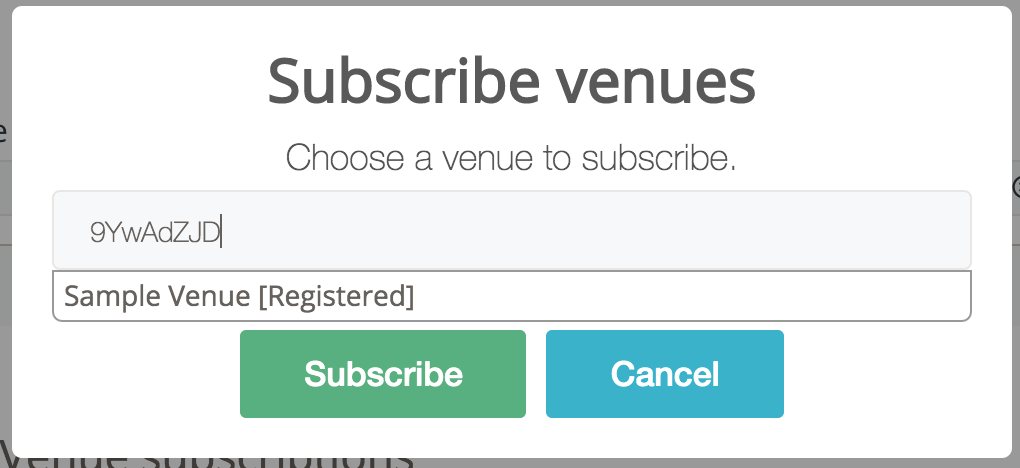
- Enter the venue's LocationId. Ensure you see the venue's name appear, and click on Subscribe
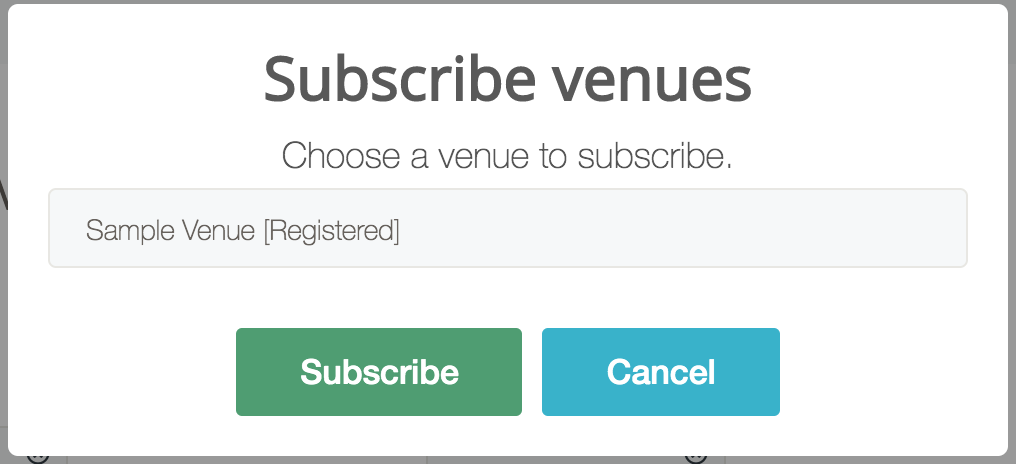
- The Venue Subscription list should now contain the venue you have connected with
Connecting using the API
1. You can use the subscription endpoint to connect to a venue.
Submit:
POST /v3/locations/9YwAdZJD/subscription HTTP/1.1
Content-Type: application/json
Authorization: Bearer xxx
{

}
Response:
HTTP 200 OK

{
 "message": "Successfully subscribed to location (9YwAdZJD)"
}
There is no harm to submit the subscription request multiple times; Doshii reconfirms your subscription each time.
The remainder of this article provides suggestions to you for what you should do after you have connected to the venue. These next steps will help you obtain the necessary data to onboard the venue to your App, and will ensure you are subscribed to receive real time events for changes that may occur to the venue's data.
Suggested actions to onboard a venue
Now that you have connected with the venue you will be immediately granted access to of the Doshii suite of APIs so you can begin your interactions. In most cases, the next steps to take are to obtain the necessary data to help onboard the venue into your own App.
At this stage have a think about what data your App may need from the venue. You may require to know about what menu items are being sold, or what the dining room table names are. Perhaps you want your App to know when the venue is trading or when it is closed. All of this data is available through Doshii.
Retrieving the Menu from a Venue
The venue's entire menu is available through Doshii. There are some very important reasons for using the Menu
- Identify the items sold by the Venue
- Identify the tax-inclusive price for each item.
- Identify the different modifications that can be made to specific items
- Identify the meal bundles and the various items associated with them
- Obtain all the different surcharges and discounts
- Obtain the item category and the menu structure
- Obtain the item PLUs (known by Doshii as the posId) so you can easily specify to the venue the items being ordered by a customer using your App
Using the Menu API means you can retrieve the venue's menu, make it available through your App, and submit orders using the venue's item posId for simple and straight forward integration!
Importing the menu
To retrieve the entire menu as a gzip compressed JSON payload use the location menu endpoint.
Submit
GET /v3/locations/9YwAdZJD/menu HTTP/1.1
doshii-location-id: 9YwAdZJD
Authorization: Bearer xxx
Accept-Encoding: gzip
Response
{
  "products": [
    {
      "name": "Toasted Sourdough & Eggs",
      "tags": [
        "Breakfast",
        "Lunch"
      ],
      "type": "single",
      "posId": "0011372",
      "menuDir": [
        "toast/breakfast",
        "eggs/lunch"
      ],
      "unitPrice": "600",
      "description": "Just ye old classic",
    }
  ],
  "surcounts": [
    {
      "name": "$3 delivery fee",
      "type": "absolute",
      "posId": "3_delivery_fee",
      "amount": "300"
    }
  ],
  "version": "zKxodgJwgpskd9Z2ZRl0cLA705jjjDCwK8Q2nVdm",
  "uri": "http://sandbox.doshii.co/partner/v3/locations/9YwAdZJD/menu",
}
A successful response will include the Venue's entire menu payload and in addition the version property. You can use this version property to keep track of when the menu changes. Subsequent requests for the menu can be made with the lastVersion property, which will either return a 304 Not Modified response or a 200 Response with the menu payload.
Submit
GET /v3/locations/9YwAdZJD/menu?lastVersion=zKxodgJwgpskd9Z2ZRl0cLA705jjjDCwK8Q2nVdm HTTP/1.1
doshii-location-id: 9YwAdZJD
Authorization: Bearer xxx
Accept-Encoding: gzip
Response
HTTP 304 Not Modified
{}
Subscribing to menu changes
When a venue makes changes to their menu products Doshii will use our Real Time Eventing service to send you the EVENT menu_updated event, advising of the change. To receive this event you will need to either register a Webhook or implement WebSockets.
Once you receive the event you can retrieve the updated item using the itemUri property from the event payload. Depending on the type of change to the menu, the itemUri may be for:
- the entire menu
- a single product
- a single surcount
- a single global option
How to use the menu payload
Doshii's menu data structure consists of some important fields, which you need to consider how to map in your App. These are:
posId - this is the internal code for the menu item, and is how the POS will identify what is being purchased. It is important to know that typically the POS will not use the App's name for an item, but will keep its own name for docket printing/kitchen printing.
name - the POS name for the menu item, which is designed for kitchen printers and receipts. This name may not be CX friendly, and you can use the Doshii Menu Management platform to make alterations to this.
price - the price of the item, in cents.
type - items can be either of type 'single' or 'bundle'. Bundle items are combos, or set meals. These have an additional object list includedItems which specifies the items which make up the bundle. Bundle items cannot be submitted as single items, primarily because they have a different concept for the POS, and must include the specification of includedItems upon any order submission.
options - the options list will contain any modification options that have been linked to the item.
variants - variants are effectively modifications to an item; eg "Extra Cheese". It is important to note that items cannot be variants and variants cannot be items on any order submission to the POS, so your menu structure should reflect similar.
surcounts - read about surcounts here.
Retrieve tables from the venue
Metadata about the venue's dining area is available through Doshii. This is useful for your App in many use cases, such as:
- if you plan to submit dinein orders
- make payments from the table
- create reservations for a table, or
- analyse average table spends at the venue
You can use the tables endpoint to retrieve all tables from the venue.
Submit
GET /v3/tables HTTP/1.1
doshii-location-id: 9YwAdZJD
Content-Type: application/json
Authorization: Bearer xxxx
Accept-Encoding: gzip
{

}
Response
[
  {
      "maxCovers": 9,
      "name": "table684",
      "uri": "http://sandbox.doshii.co/partner/v3/tables/table684",
      "updatedAt": "2019-10-24T10:58:00.721Z",
      "isActive": true,
      "id": "1",
      "createdAt": "2019-10-24T10:58:00.721Z",
      "criteria": {
        "canMerge": true,
        "isOutdoor": true,
        "isSmoking": false,
        "isCommunal": true
      }
    }
]
Subscribe to table changes
Doshii uses our Real Time Eventing service to keep you updated when a venue changes information about its tables. Doshii sends to your registered Webhook or WebSocket the following events, depending on the change performed at the venue:
Retrieving POS Terminals from the venueTypical on-premise POS setups at the venue may involve a single POS server and multiple POS terminals. Your App may be dependent on knowing which POS terminal is being used at the venue to make a payment, or an order.
For example, traditional EFTPOS devices are hard wired with their POS terminals so the EFTPOS device knows which POS terminal to communicate with. In a Doshii setup, your payment device will know which POS terminal to communicate with on the basis of its unique doshiiId.
To retrieve POS terminals use the locations terminals endpoint
Submit
GET /v3/terminals HTTP/1.1
doshii-location-id: 9YwAdZJD
Content-Type: application/json
Authorization: Bearer xxxx
Accept-Encoding: gzip
{

}
Response
[
 {
 "doshiiId": "bEK3ryO7",
 "name": "bar1",
 "area": "bar",
 "ref": "1235",
 "description": "Terminal at end of bar",
 "locationId": "4gJpXq9B",
 "createdAt": "2018-04-27T05:56:09.156Z",
 "updatedAt": "2018-04-27T06:14:09.156Z",
 "uri": "https://sandbox.doshii.co/partner/v3/terminals/bEK3ryO7"
 },
 {
 "doshiiId": "hEKf7D43",
 "name": "bar2",
 "area": "bar",
 "ref": "1238",
 "description": "Terminal at middle of bar",
 "locationId": "4gJpXq9B",
 "createdAt": "2018-04-27T05:56:09.156Z",
 "updatedAt": "2018-04-27T06:14:09.156Z",
 "uri": "https://sandbox.doshii.co/partner/v3/terminals/hEKf7D43"
 }
]
The next steps in your App development
Now that you have successfully connected with a Doshii venue, and obtained necessary onboarding information the next steps are to start using the rest of Doshii's APIs to add the necessary functionality to your App:
- Placing an order using the Ordering API
- Making a payment using the Payments API
- Create a Booking using the Bookings API
- Certify your App with Doshii